Avocados are superfoods and are a fantastic source of healthy fiber, fat, and vitamins B, C, and E. If you are planning to grow this fantastic superfood in your garden, this guide covers everything you need to know about starting and growing avocado trees.
From starting avocado seeds, to transplanting, growing stages, varieties and sunlight requirements, you’ll find answers to all of your questions here.
Growing Avocado Trees 101: Everything You Need to Know
-
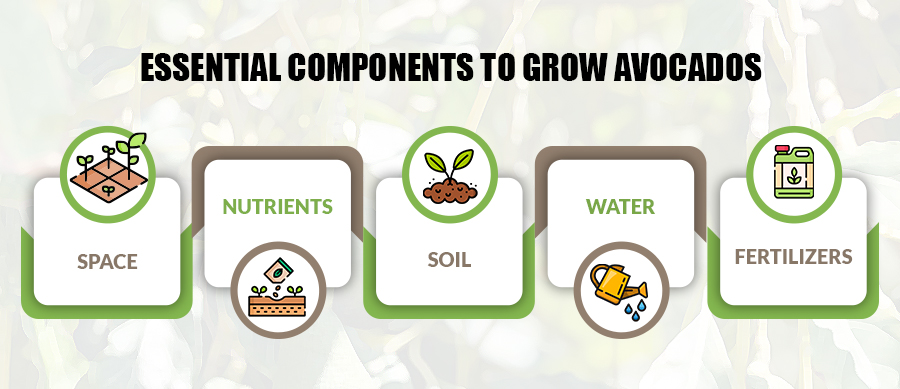
Space
Plant avocado saplings at least 10 feet away from structures. Leave at least 30 feet between each tree if you decide to plant more than one.
-
Nutrients
Zinc and nitrogen are two important nutrients for growing avocados. Nitrogen helps facilitate healthy growth and development of young avocado trees. And zinc helps to improve fruit development and production.
-
Soil
Avocado trees require rich, loamy, and well-draining soil. Properly aerate the soil and ensure it does not retain excess water, as soggy soil will quickly rot roots. Soil pH, which is acidic to neutral and is between 5-7 pH, is suitable for growing avocado trees. Just ensure that the tree receives plenty of sunlight throughout the day.
Pro Tip. Have a supply of this kind of soil (say, for instance, one rich in humus and organic matter) available to use as a potting medium by the time your avocado’s roots and stem are well-established.
-
Water
Avocado trees benefit from deep and infrequent watering. It encourages the root to grow strong and deep. Once the soil begins to dry out, you should water deeply. During summer months, these trees require more frequent watering.
Young trees need regular water once they start growing. At the same time, mature trees should be given around 2 inches of water every week.
-
Fertilizer
It is essential to fertilize avocado trees, especially during their growing month, as it helps encourage fruit production and healthy growth. Nitrogen is necessary for tree’s growth so your fertilizer should contain high amounts of nitrogen. Start fertilizing the tree in the late winter to early spring. Feed it until the fall based on the instructions included with your selected fertilizer.
Warm Temperatures
Avoid cold, wind, and frost when planting and growing avocados. Generally speaking, avocado plants do not thrive in inclement weather. Avocado plants can be completely killed by snow, cold winds, and sudden temperature dips, which can be detrimental even to hardier plants.
Move Indoors in Winter
You might be able to get away with leaving your avocado plant outside all year if you reside in a tropical or subtropical region with relatively mild winters. To protect your mature plant from the weather, however, you should be ready to transfer it indoors for the winter if you live in a region where the winter temperature is expected to fall below freezing.
How to Plant Avocados?
-
When to Plant
Transplant avocado trees outside in the spring so they have enough time to grow before winter comes.
Pro Tip. It is best to gradually introduce a plant to outdoor settings before moving it outside, sometimes known as “hardening it off.” Start the pot at a spot that receives the majority of the day’s indirect sun. Move it to regions that are brighter and brighter over time.
-
How to Plant
Select a planting location that provides ample space for these tall trees to grow and thrive. The roots of the avocado trees are sensitive, so don’t disturb the roots unnecessarily during the planting process. The location should offer wind protection to trees.
Dig a wider hole than root structure to plant an avocado tree. The hole’s depth should match the root ball’s height, as planting the tree too deep or shallow can create problems.
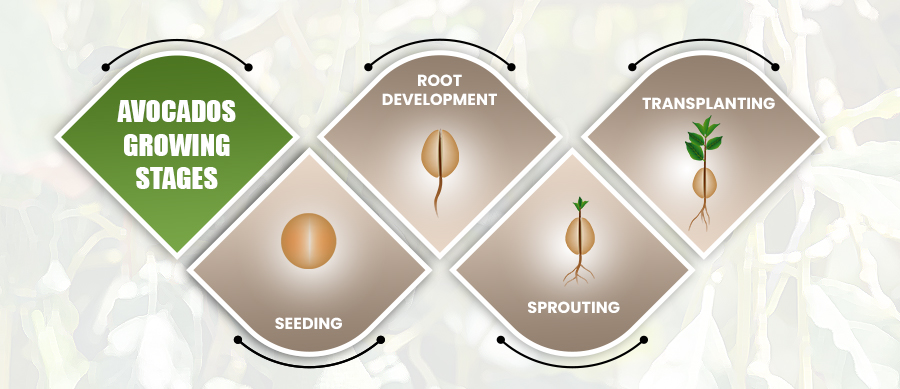
Avocados Growing Stages
Here’s a quick look at the growing stages of avocados:
-
Seedling
The first step includes selecting a ripe avocado. You can start an avocado tree from the pit of a store-bought avocado. Here’s a simple process:
Push 3-4 toothpicks into the avocado pit. Then, place the avocado over a jar or bowl filled with water. Thanks to the toothpicks, the bottom half of the pit will be suspended in the water, while the top half will remain dry. Place in a warm location. After about two weeks, a root system and sprout will emerge.
Pro Tip. Keep your eye on the water level and fill it up whenever the bottom of the pit is not fully submerged.
-
Root Development
After a few weeks, a crack will appear on the seed and a small root will start growing from the bottom. Ensure water consistency during the root development stage. Soon roots will begin growing downwards, anchoring themselves and seeking nutrients for their growth.
-
Sprouting
As the root develops, a shoot will emerge from the top of the seed. The first true leaves, known as cotyledons, will unfurl. Your sprouting avocado seeds require sunlight, so find a sunny spot near a window or consider investing in a grow light. Aim for at least six hours of indirect sunlight to keep sprouts happy.
-
Transplanting
When the sprout is a few inches tall and has a few sets of leaves, transplant the seedling to a new location, outdoors, if your climate is right, or a pot for indoor/outdoor growing. Fill the pot with a well-draining pot mix and ensure it has proper drainage holes.
Dig a hole, place seedlings in soil with roots up and cotyledons above soil. Keep it in a well-lit spot by a window that receives indirect sunlight.
Pro Tip. Pinch off any new leaves that are emerging from the stem’s tip once it has grown to a height of around one foot while leaving the remaining leaves unharmed. Every time the plant develops another 6 inches, pinch off the freshest, tallest sets of leaves. By doing this, the plant will be stimulated to produce new shoots, which will eventually result in a fuller, healthier-looking avocado tree.
Lifecycle of an Avocado Tree: Infographic

How to Harvest Avocados?
For nursery-bought trees, you can expect fruit in three to four years. When you see fruits appearing, wait until they grow to their mature size. The fruits don’t ripen on the tree, so you can pick avocados as soon as they grow in size.
Bring avocados indoors and let them rest on the counter until ripe. Give it a gentle squeeze to test its softness. You can harvest your avocados once you notice their flesh is soft but not squishy.
How to Store Avocados?
Store avocados at room temperature until they are ripe. After they ripen, store them in the refrigerator for 2-3 days. This will slow down the ripening process.
For storing, cut avocados and keep the pit with the avocado. Cover the cut surface with vinegar or lemon juice to prevent it from browning.
Avocado Varieties for Growing
When selecting avocado variety, it is essential to consider the tree’s tolerance to heat and humidity. Also, check the tree’s resistance to common pests and diseases. Below are some of the common varieties of avocados to grow:
-
Hass
This variety has a rich, creamy flavor and high oil content. It is resistant to diseases and can withstand high temperatures and humidity. It propagates well and matures in 8-9 months after flowering. The fruit is medium to large and has a bumpy skin that turns dark from green to black when fully ripe.
-
Fuerte
This variety produces medium-sized fruit with a mild flavor and creamy texture. It matures in 6-8 months after flowering. These medium-to-large avocados tend to have smooth skin and an elongated pear shape. The flesh of Fuerte avocados is thick, creamy, and slightly oily.
-
Reed
This variety produces large fruit with a rich flavor and creamy texture. Its interior is delicate, but the creaminess of the flesh is delectable, less oily, with one of the boldest and richest flavors. It is a sturdy and resilient variety that requires less maintenance and produces a great crop.
-
Lamb Hass
This variety is like Hass but is more tolerant to humidity and heat. It produces fruit with a creamy texture and has an exceptional nutty flavor. Apart from this, it has easy peeling qualities.
Budding an Avocado Tree
Budding (or grafting) is a process used by farmers to enhance and facilitate fruit production. Essentially, you take budwood from a mature avocado tree and graft it onto the rootstock of the new tree.
In other words, to bud an avocado tree, you’ll need access to one that is producing nice fruit, as well as a seedling that is 24-30 inches tall. In general, spring is the best time for budding.
Here’s a quick process:
- Cut a T-shape through the plant’s stem 8 to 12 inches from the ground using a sharp knife.
- Slice through approximately a third of the stem’s horizontal thickness, then turn the stem over and slice about an inch along the stem.
- Peel the bark from the stem with the knife.
- Cut a bud from the “producer” tree you’ve chosen, which is resilient and averse to illness in addition to providing quality fruit.
- Make a diagonal incision starting half an inch below the bud and ending an inch below it to remove it from the tree.
- Make a cut an inch above the bud to remove it as well if it is not at the tip of the branch or twig but rather in the middle of the segment.
- Insert the bud snip you took out of the “producer” tree into the seedling’s T-shaped cut.
The green beneath the bark of each branch should be touching. You can then use a budding clip to hold the budwood in place. After about a month, these trees will heal and join together.

