Tulips, with their delicate petals and graceful stature, have a magical way of turning an ordinary patch of soil into a tapestry of elegance. Do you want to discover the joy of watching these colorful blooms unfurl in your garden?
If you are thinking of growing these colorful flowers in your garden, this tulip growing guide will help you start a tulip garden that’s vibrant every spring. The process of nurturing these beautiful bulbs to bloom is a thrilling experience. So, keep reading to learn the secrets of growing tulips.
Growing Tulips 101: Step-by-Step Guide
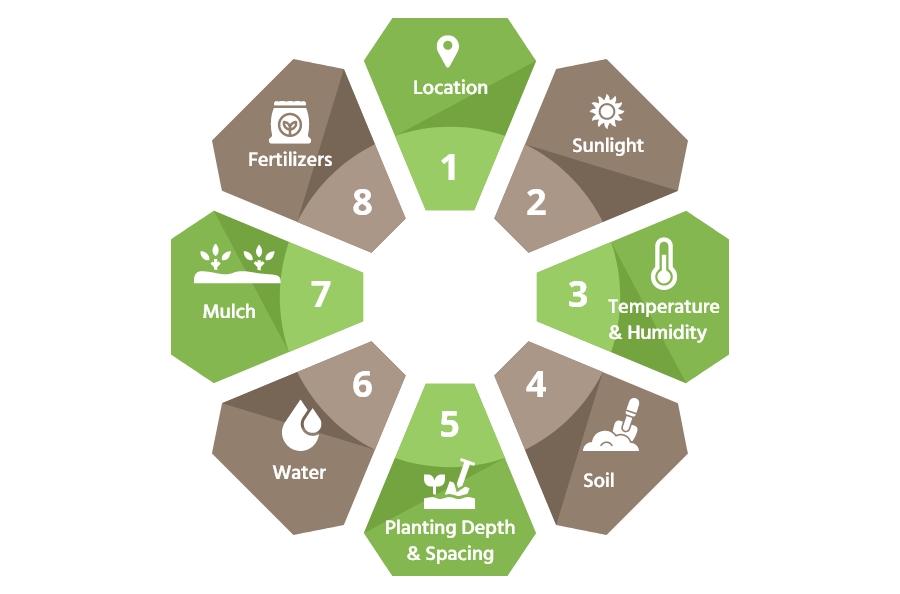
1. Location
Tulips grow well in sunny areas with well-draining soil. They can also grow well in partially shaded areas. To help bulbs grow better in dense or sandy soil, add decomposed organic matter or perlite before planting.
2. Spacing
Spacing depends on the plant’s size. The smallest wild-type tulip bulbs should be spaced about 4 to 6 inches apart. Space medium and large hybrid tulip varieties 5 inches apart.
3. Light
In general, tulips thrive in partial to full sun. Because they grow in the spring, before the trees have full leaf coverage, tulips thrive in areas that might not receive full sun in summer (but do in spring). These spaces under trees are often ideal for growing tulip bulbs and other spring bulbs.
4. Soil
Tulips require well-draining soil with a neutral pH that is slightly acidic (6.0 to 7.0). Adding compost to the soil provides essential nutrients to the bulbs and enhances drainage. Be sure to add compost when you plant tulip bulbs.
Adding compost to the soil helps earthworms move through it. This also improves aeration.
5. Watering
Once you plant bulbs, you should water them immediately. After this, withhold water except during extended dry spells. If you live in a region that receives rain every week or two, you don’t need to water tulips. In arid regions, it’s recommended to water tulip bulbs every two weeks.
6. Temperature & Humidity
Tulips thrive in regions with cool-to-cold winters and dry, warm summer conditions. The bulbs require about 12 to 14 weeks of temperatures below 55 °F to bloom. Plant tulip bulbs as annuals in areas with warm winter temperatures.
Tulips thrive in dry areas with little rain, as too much humidity and rain can lead to bulb decay.
7. Fertilizers
Mix some compost, granular fertilizer, or bonemeal into the soil when you plant tulip bulbs. Feed them each year in the spring, as they sprout.
8. Mulch
Use mulch to cover tulip bulbs if you live in a cold climate. Although tulips can overwinter in very cold temperatures (-9°F), mulch will add an additional layer and protect them from the coldest of temperatures.
After planting bulbs, cover them with a 2- to 3-inch layer of straw or shredded bark. This will protect them from deep frosts and help retain moisture.
Growing Tulips: When & How to Plant
When to Plant Bulbs?
As tulips are spring-flowering bulbs, you should plant them in the fall. You can plant tulip bulbs from mid-October through January. However, November is the best month for planting tulips.
How to Plant Tulip Bulbs?
Dig planting holes about 3-5 inches deep and a few inches apart from one another. You can usually fit 9-12 bulbs in a one square foot area. Put tulip bulbs in the holes with the pointed end up.
For planting tulips in a pot or container, fill half of the pot with peat-free multipurpose compost. Dig holes, pop in the bulbs, and then top it with compost.
Tulip Growing Stages
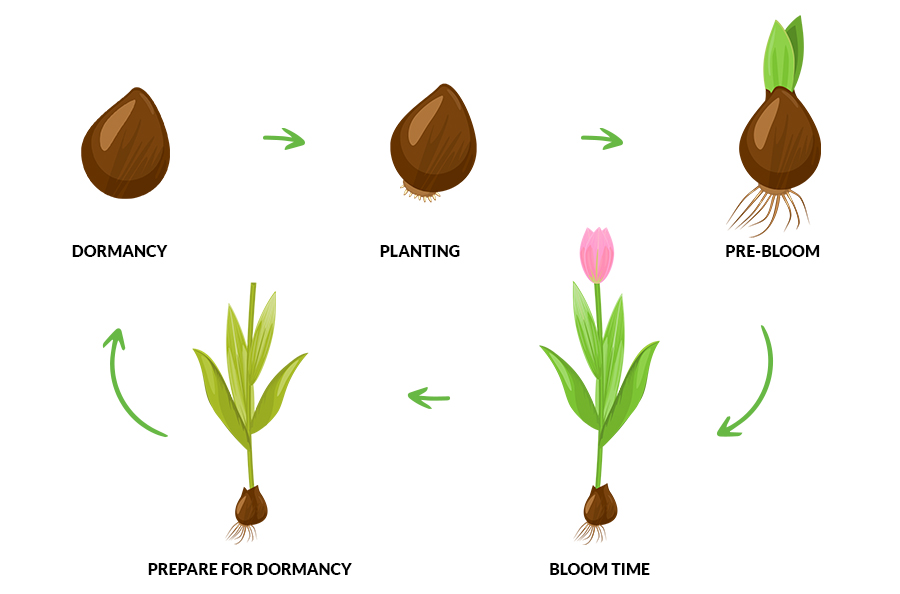
1. Planting
Tulips start as bulbs. Planting usually occurs in the fall, a few weeks before the ground begins to freeze. Plant bulbs in well-draining soil and they will remain dormant during winter months.
2. Root Growth
After the planting process, the bulbs start developing roots. Roots anchor the plant and help absorb water and nutrients from the soil. Roots continue to grow in the fall and winter, thereby establishing a strong root system for the plant.
3. Sprouting
As the weather turns warm in spring, tulip bulbs begin to sprout. Shoots emerge from the soil, and then the plants begin to grow upwards. An increase in sunlight and temperature in the spring triggers this stage.
4. Foliage Development
The sprouts grow green leaves, thereby forming the foliage of the tulip plant. These leaves help in the photosynthesis process and allow the plant to grow stronger.
5. Bud Formation
In spring, tulip plants form flower buds at the tip of the stem. These buds contain the petals and reproductive organs of the flower. This stage helps in the eventual flowering of the plant.
6. Flowering
The tulip buds open and reveal the colorful petals inside. This requires the right environmental conditions, e.g. increasing hours of sunlight and increasing spring temperature. In the flowering stage, the tulip is in full bloom. This is the stage where tulips display their beauty. This stage happens quickly, within 2-4 weeks of sprouting.
7. Wilting & Dormancy
Once the tulip has bloomed, the petals gradually wilt and fall off. In cool springs, they may flower for 1-2 weeks, but in warmer springs, blooms may last just a few days.
When they begin dropping petals, the plant enters a dormancy period and redirects the energy from the leaves back into the bulb. The foliage withers and dries up. During this time, the tulip bulb stores energy for the next growing season.
Moving Tulip Bulbs
If you want to move your tulip bulbs, you have to get the timing right. This will ensure your tulips will thrive in a new location.
Generally, you want to wait until late summer or early autumn to transplant tulips. As the plant enters dormancy, its foliage collects energy for the following spring. This is important. If you don’t allow the foliage to grow after the flowers bloom, you will limit this energy-gathering phase, and the plant may not thrive the following spring.
Therefore, wait until the green foliage dies back. This occurs in late spring to early summer. After the foliage dies back, you can move the bulbs, but generally, you should wait until the fall.
Collecting Seed Pods from Tulips
Although you can move bulbs, you can also propagate tulips and collect their seed pods. Pods grow at the top of the stem, after the flowers drop their foliage.
Here are some essential steps:
-
- Monitoring tulip plants throughout the summer season is essential. As the season progresses, the flower petals wilt and drop off. Once this happens, the seed pods swell and will be ready for collection.
- Carefully cut each seed pod from the stem. Wear gloves when harvesting to avoid any potential skin irritation.
- Place seed pods in a paper bag and leave them in a warm and dry place for a few days. Allow them to dry out.
- Once they are dry, they’re generally ready to replant. You can try to plant in loose soil. Your goal is to develop new tiny bulbs.
- Another option: You can also store your freshly collected (and dried) seeds in the refrigerator for about 90 days. After this period, you can then start the seeds in a starting mix indoors. After the first foliage dies back, tiny bulbs will have formed (which you can then transplant outdoors) as autumn approaches.
Harvesting tulip seeds in summer helps in successful germination and growth of new plants. With the right harvesting conditions and patience, you can enjoy a beautiful tulip display in the spring.
How to Store Tulips?
You can store tulip bulbs for a long time out of the soil for about 12 months, provided the storing conditions are suitable.
- You should keep these bulbs in a well-ventilated, warm place where the temperature is above 60°F. This temperature helps bulbs to develop flower buds.
- Before planting, you should check that bulbs are plump and firm.
- To store tulip bulbs, use a mesh bag. This type of bag is breathable and allows air to circulate properly inside the bag. This will enable bulbs to remain vibrant and healthy.
- Rinse tulip bulbs before storing them to remove debris or soil from their surface.
- Once you rinse them, place them in a mesh bag or any other suitable material. Seal the bag tightly to prevent exposure to excess water.
- If you keep bulbs for a while, check their humidity levels regularly and adjust them as needed.
Removing Bulbs for Storage
Care for your tulip bulbs when removing them from the soil. Here are some tips:
- Lift tulip bulbs out of the soil and dry them thoroughly
- Store them in a well-ventilated location and ensure they get warm enough temperature.
- When storing in winter, it is essential to provide sufficient sunlight so that bulbs can continue to flower naturally
- Avoid exposing them to direct sunlight after drying, as the buds might become scorched and damaged
- Storing tulip bulbs under a bright light after harvesting them helps the buds develop healthy blooms. Take care to complete this process briefly as it might cause damage to stem cells.
- Store tulips in a moderate environment with adequate weather and sunlight.
How to Care for Tulips?
Follow below tips to take the best care of your tulips:
- Plant tulip bulbs in the fall as they need the winter chill to spur emergency in the spring.
- Selecting a full-sunny spot under deciduous trees will work well as they go leafless in early spring and winter.
- Ensure well-draining soil will not lead to waterlogging or too much humidity or moisture.
- Water bulbs only when they get dry, and give supplemental water if it has not rained in one or two weeks.
- Feed the soil with bonemeal, compost, or granular fertilizer when planting the bulbs.
Best Tulip Varieties
1. Darwin Hybrid Tulips
This variety has large and classic tulips that possess strong and sturdy stems and vibrant colors. They are available in colors like white, yellow, pink, and red. This variety has long-lasting blooms and is perfect for cut flower arrangements. They are resistive to wind and weather.
2. Triump Tulips
This variety is mid-sized and comes in a wide range of attractive hues. It has a classic tulip shape and is quite hardy. It has medium-length stems and is suitable for garden planting and cut flower arrangements.
3. Parrot Tulips
This variety exhibits heavily scalloped and fringed petals, which resemble the feathers of a parrot. This variety has got its name from its distinctive coloration. As this variety is large and robust, it requires protection from wind and heavy rain.
