Peppers are one of the most popular garden vegetables to grow. In general, they’re easy to produce, and there are hundreds of varieties, from spicy hot (like habaneros) to mild like banana peppers.
Ultimately, whether growing peppers from seed or using pepper starts, you can produce buckets full of fruits if you get the conditions right. Interested in how to go about cultivating peppers? This is your go-to guide, covering pepper growth stages, growing conditions, troubleshooting tips and more.
Growing Peppers 101: Step-by-Step Guide
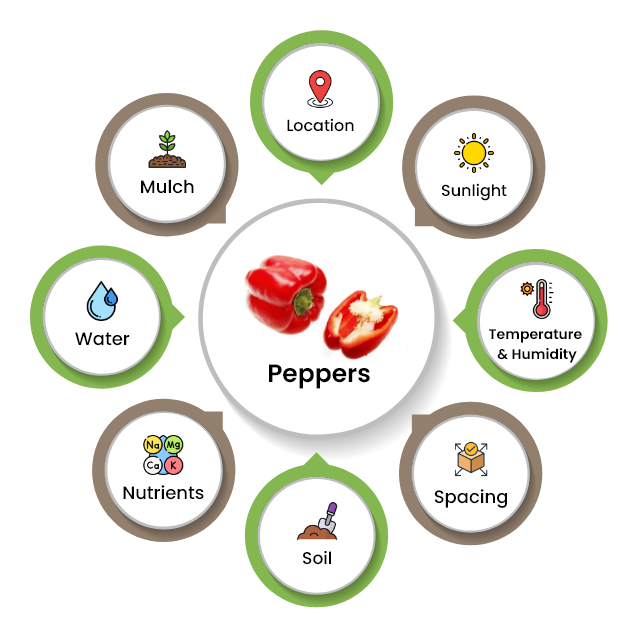
1. Location
Peppers love sun! Choose a location that receives at least 8 hours of direct sunlight per day.
2. Temperature & Humidity
Peppers are heat lovers too! Outdoor temperatures should be 65-80°F with humidity around 70-80%.
3. Spacing
Space pepper plants about 18 inches apart with rows 30-36 inches apart.
4. Soil
Peppers require rich and well-drained soil with a pH of about 6.5.
5. Nutrients
Fertilize pepper plants using a balanced fertilizer rich in potassium, nitrogen and phosphorus.
6. Water
Water plants deeply and at the base. Aim to keep the soil moist to encourage your plants to produce more peppers.
7. Mulch
Mulch your pepper plants with straw, compost, or grass clippings to conserve water and moisten the soil.
How to Grow Peppers from Seed?
- Fill pots or seed-starting trays with a pre-moistened potting mix.
- Start pepper seeds about 8 weeks before planting outside.
- Plant two to three pepper seeds per pot or planting cell at a depth of ¼ – ½” deep.
- Cover the seeds with about ¼ inch layer of soil.
- Move the growing containers into a warm location.
- Water the seeds regularly to keep the soil consistently moist.
- Be patient! Pepper seeds can take up to 21 days to germinate.
How to Grow Peppers in Containers?
- Select a container about 10-12 inches deep and wide enough.
- Choose a container with sufficient drainage holes.
- Select a potting soil mix that retains water and is rich in organic matter.
- You can mix in compost for added nutrients.
- You can grow 2-3 plants in this size pot.
- Water regularly to keep the soil consistently moist.
- Apply balanced fertilizer every 2-3 weeks. However, if you use quality soil, you won’t likely need to fertilize for the first month.
How to Transplant Pepper Seedlings?
Hardening off your pepper plants is essential, once you’re ready to move them outdoors. The hardening process gets the plant acclimated to direct sunlight and wind.
Generally, this process lasts about 10 days. On Day 1, you’ll leave the plants in direct sunlight for just about one hour, and then, each day gradually increase the amount of time they spend outdoors.
Once they’ve been exposed to outdoor conditions for a full 24 hours, you can transplant them in the garden. Here are some pepper transplanting tips:
- Dig a hole that’s large enough for the whole root system to fit comfortably.
- Remove the seedlings from its container.
- Gently place the pepper plant in the hole.
- Keep the soil line at about the same height.
- Fill in any gaps with high-quality soil.
- Cover the entire root system with one inch of soil.
- Water the plant thoroughly.
When to Plant Peppers?
- To start peppers indoors in pots, start pepper seeds approximately 8-10 weeks before the expected frost date.
- Transplant seedlings outdoors about 2-3 weeks after the threat of frost has passed.
- This is the time the soil reaches a temperature of 65°F.
- Transplant seedlings at nighttime when the temperature is above 50°F.
Pepper Plant Growing Stages
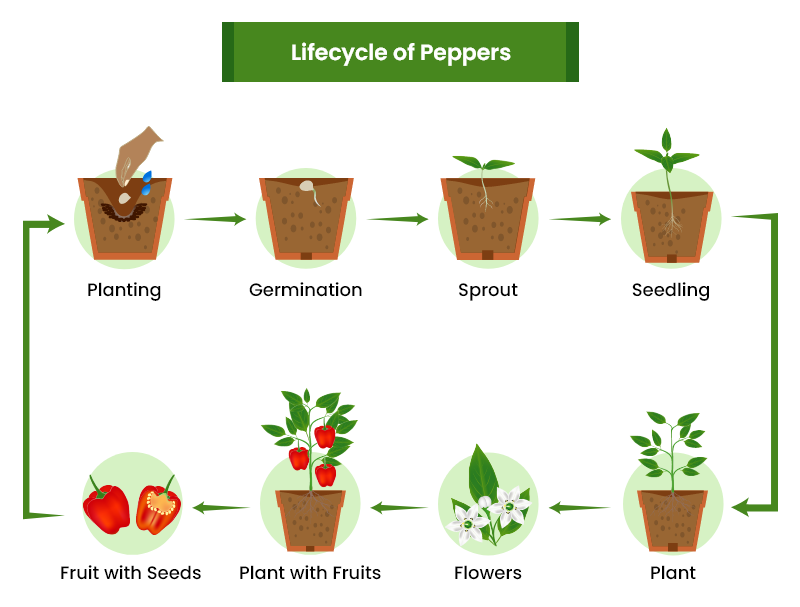
1. Seed
Pepper seeds need warmth. In fact, outdoor temperatures should be about 60-70°F overnight for seeds to germinate. However, you can start seeds indoors to get a head start on the season.
2. Seed Germination
Pepper seeds take 7-21 days to germinate. If planting outdoors, wait until soil temperatures are at least 65°F. Indoors, you can use a seed starting mat to help create the ideal conditions.
Once the seeds sprout, they start developing roots and shoots. The first leaves that appear are cotyledons. After a week, the first set of true leaves emerge. These leaves are large and are different in shape than cotyledons.
3. Vegetative Growth
Pepper plants develop more leaves and establish a robust root system. They grow up to 3 feet tall and 2 feet wide.
Ensure there is ample space for your peppers. This promotes proper development and prevents stress. Thin out excess plants to prevent overcrowding and competition for resources. Apply mulch around plants to conserve moisture and prevent weed growth.
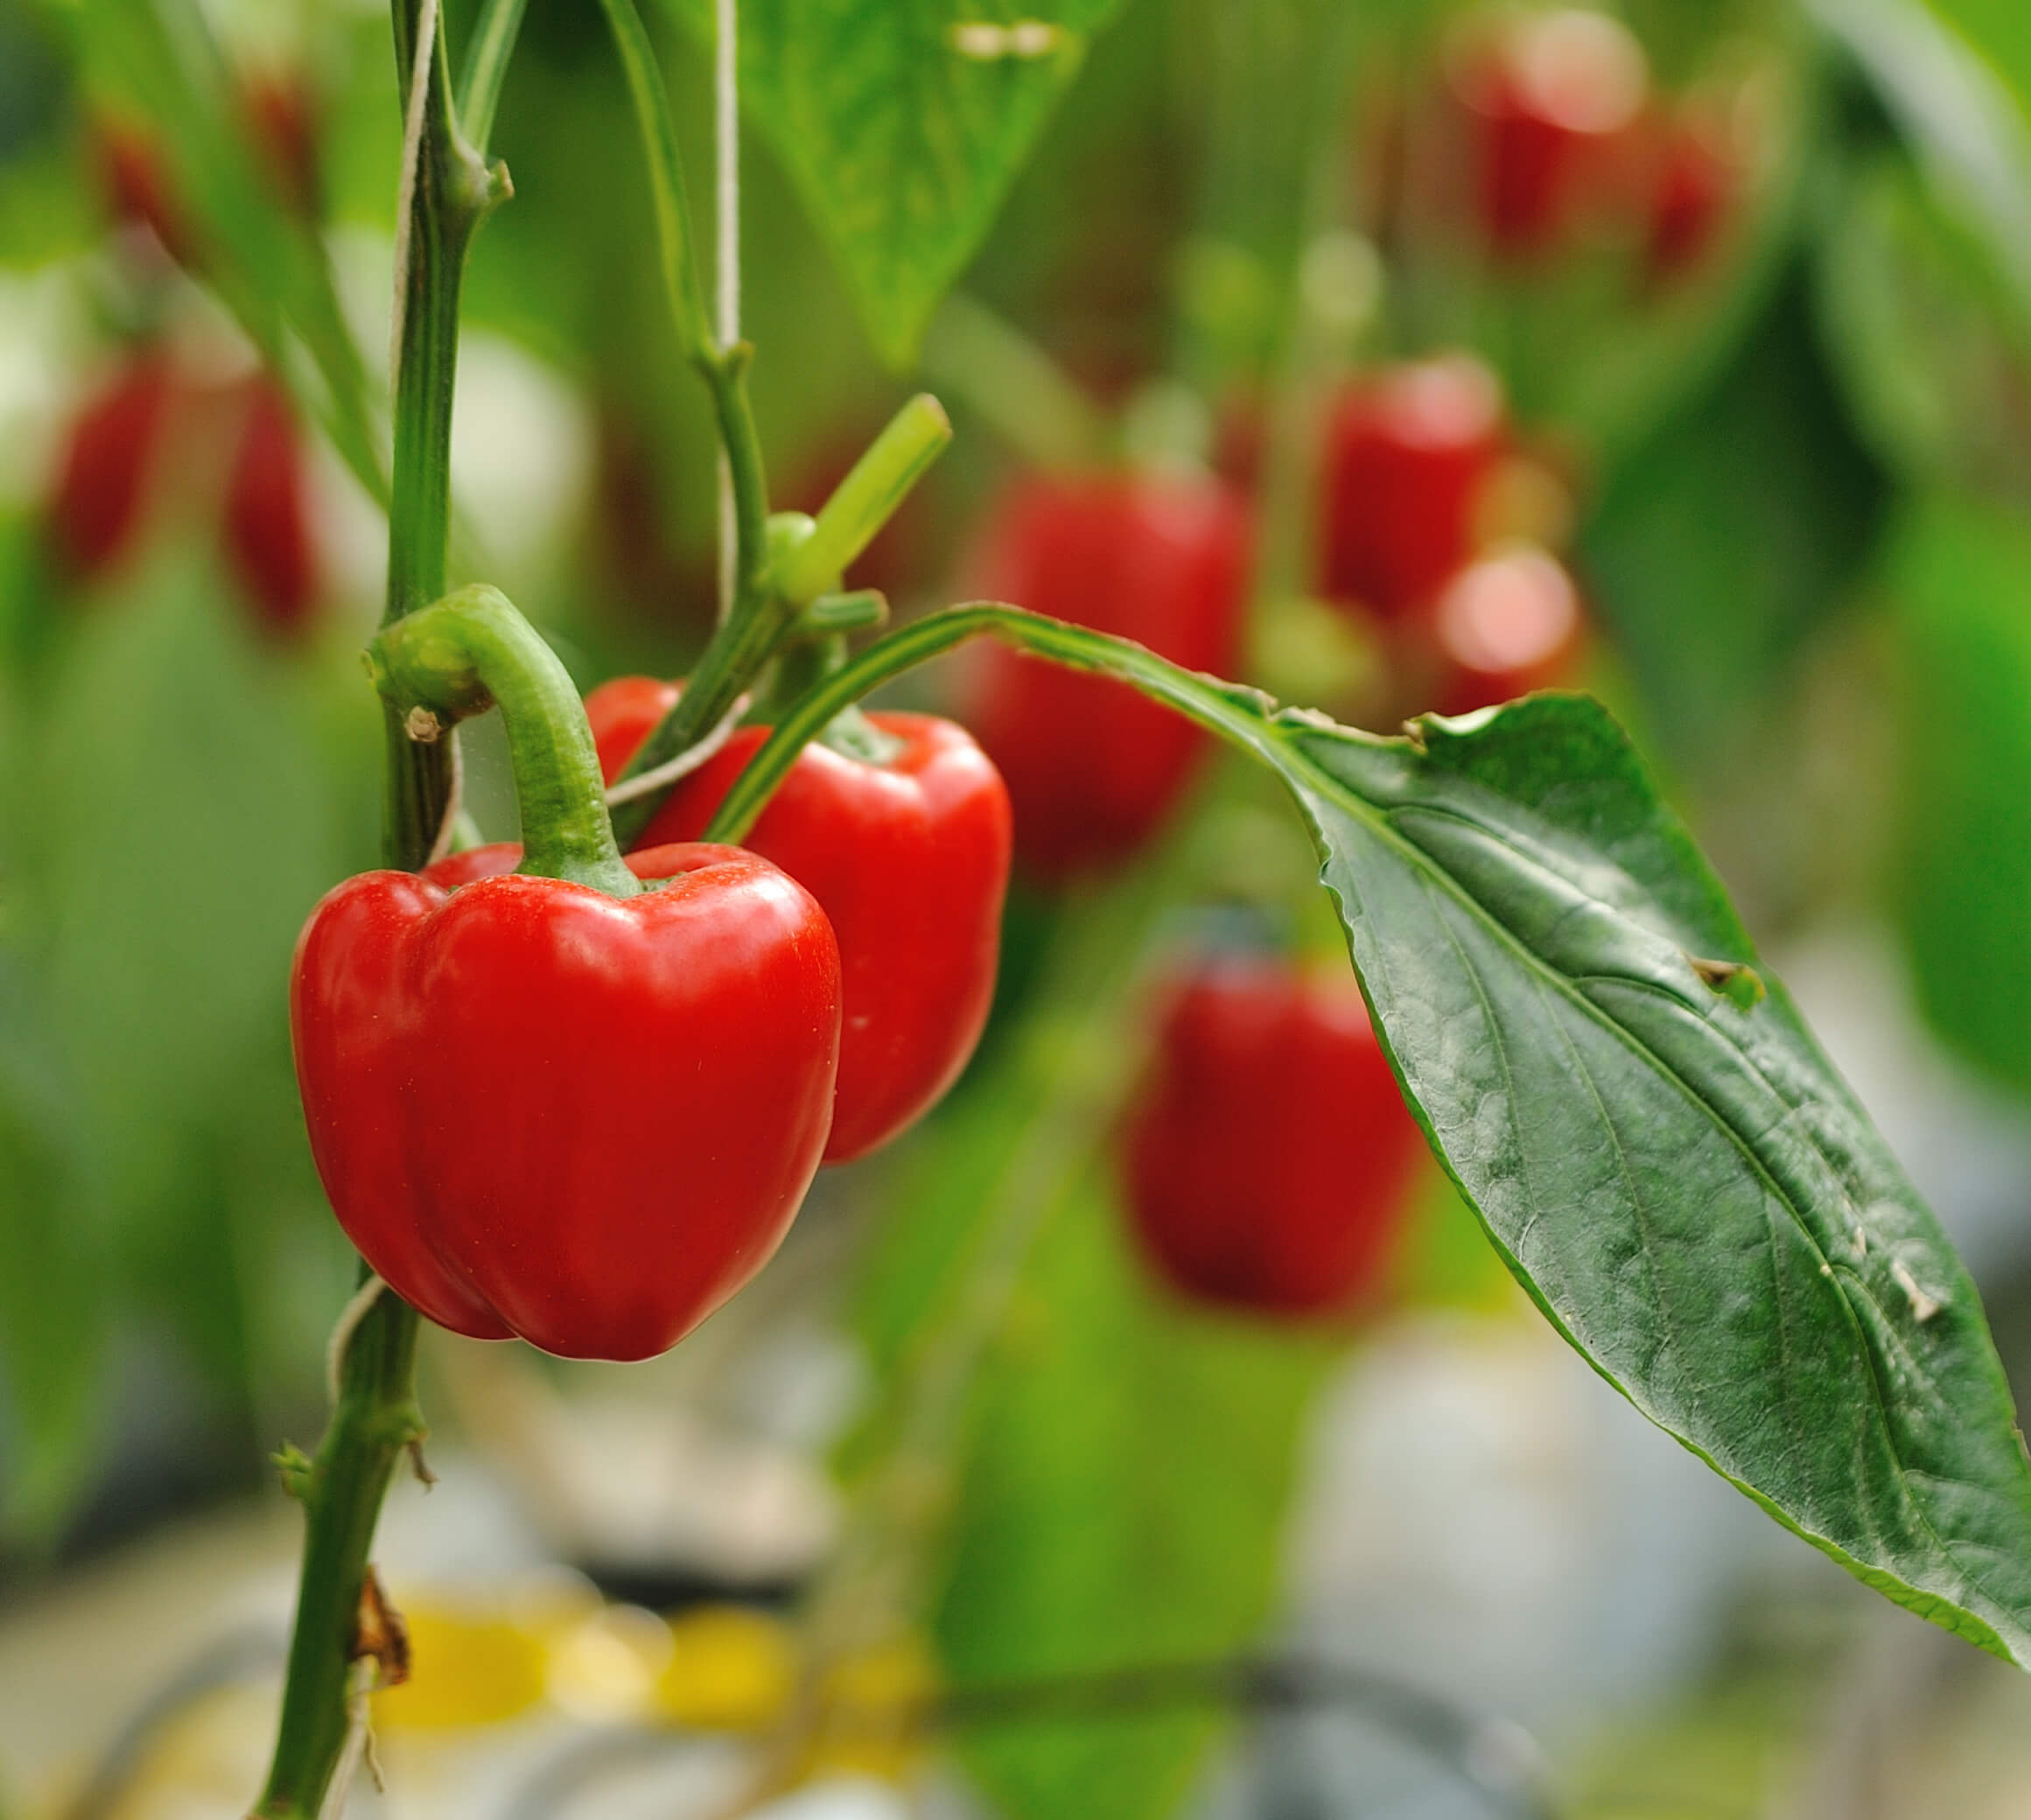
4. Flower Blossom
Once the pepper plant has grown and matured, it enters the flower blossom stage. The plant produces small white flowers (although sometimes purple). These flowers develop into a fruit. At this stage, you should not over-fertilize.
5. Flower Pollination
Once the pepper plant has produced flowers, it enters the pollination stage. Pollinators like hoverflies and bumblebees visit the flowers and pollinate them.
However, pepper plants can self-pollinate and cross-pollinate. When insects help with pollination, it can result in bigger and heavier fruits. To attract pollinators, plant flowering crops near your pepper patch.
6. Fruit Development
The plant produces small green fruits, which eventually grow and mature into peppers. The fruit development stage depends on the variety and growing conditions.
Typically, it takes about 35 days for peppers to reach their full size. Once at full size, it takes about two weeks more for the pepper to ripen and begin to change color.
As the fruit grows and matures, peppers can change from green to yellow, orange, or red, based on the variety. There are numerous varieties, from white to purple or black.
7. Harvest
Once the pepper has reached ripeness, you can harvest them. This is the last stage is the last in the pepper’s growth cycle.
These signs indicate it might be the right time to harvest bell peppers:
- The mature size is about right for their variety.
- The desired color (you may leave them on the vine to further ripen).
- The peppers are firm and shiny.
After you harvest bell peppers, the plant continues to produce more flowers and fruits. You can continue to harvest throughout the growing season.
How to Harvest Peppers
Harvesting peppers at the right time of the day directly affects how well the fruit lasts in storage. Peppers should be harvested when they have a firm texture, thick walls, and are green. Peppers usually ripen in 65-85 days from transplanting seedlings outdoors. It may take up to 150 days if grown from seed.
To harvest peppers, follow these steps:
- Use a sharp knife, scissors, or shears to cut the stems cleanly.
- Avoid pulling or twisting the pepper, as it might damage the plant.
- Leave some of the stem attached to the plant.
- Handle harvested peppers gently to avoid bruising or damaging their delicate skin.
- When harvesting hot peppers, use gloves to protect your skin from the capsaicin oil of peppers.
How to Store Peppers?
Store fresh peppers in the refrigerator. Place the peppers into a plastic bag and keep them in the vegetable drawer. The optimal temperature to store peppers is between 40-45°F.
Follow the below steps:
- Clean the peppers and ensure they are completely dry.
- Remove the stems and cut off the tops.
- Scoop out seeds and inner membrane.
- Replace tops and wrap each full pepper in a plastic wrap.
- Place wrapped pepper in a zip-top freezer bag.
- Press as much air out of the bag as possible.
- Place them in the low-humidity drawer.
- Store them away from ethylene producers like apples, bananas, and tomato.
NOTE: Avoid chopping peppers until you need them. You can store the unused portion of peppers in an airtight container and keep in the refrigerator.
Best Pepper Varieties
Let us learn about different pepper varieties that you can consider growing in your home garden:
1. Bell Pepper
This pepper variety is large and green when it is immature. It is slightly bitter in flavor, turns red when mature and becomes sweeter. You can find this pepper variety in white, pink, orange, yellow, and even purple and brown varieties.
This ubiquitous and crunchy bell pepper is also known as sweet pepper or capsicum. As it has a high-water content, it adds moisture to any dish. People use them in various dishes and cuisines, from salads to stir-fry to enchiladas.
2. Jalapeno Pepper
The king of spicy peppers! Even though they do pack some heat, they are palatable. Farmers pluck this Mexican pepper from the vine while it is still green.
If it ripens for more time, it turns red with a slightly fruity flavor. People use it in sauces and salsas. They call it chipotle when they dry or smoke it.
This hot pepper variety is easy to grow in your garden. Harvest green jalapenos as soon as they achieve a mature size or leave until they turn fully red.
3. Rocoto Pepper
This South American pepper variety looks like a miniature bell pepper. It comes in shades of red, yellow, and orange. The hottest rocotos are yellow, but red rocotos are the most common.
This pepper has black seeds, and people sometimes refer to it as the hairy pepper because of its furry leaves. They are large, have thick and juicy flesh, and are used in salsas.
This rocoto pepper variety packs an excellent level of heat and great flavor. It is usually 5 to 7 cm wide but can change in size and shape based on where it grows.
Its skin is smooth, taut, and glossy, and it ripens from green to dark red on maturity. This pepper variety initially has a sweet, fruity, and grassy flavor followed by a moderate to hot spice level.
Common Pests & Diseases Problems with Peppers
Diseases affecting peppers’ growth are blossom end rot, anthracnose, and bacterial spot. Pests that might affect the development of peppers are aphids, thrips, whiteflies, and pepper weevils.
Practice good hygiene by removing plant debris and weeds. Choose disease-resistant pepper variety, consider crop rotation, and space plants adequately to promote airflow and reduce humidity.
It is essential to monitor regularly to check for signs of pests and diseases. Apply organic or chemical treatments as required by carefully following label instructions.
Companion Plants for Peppers
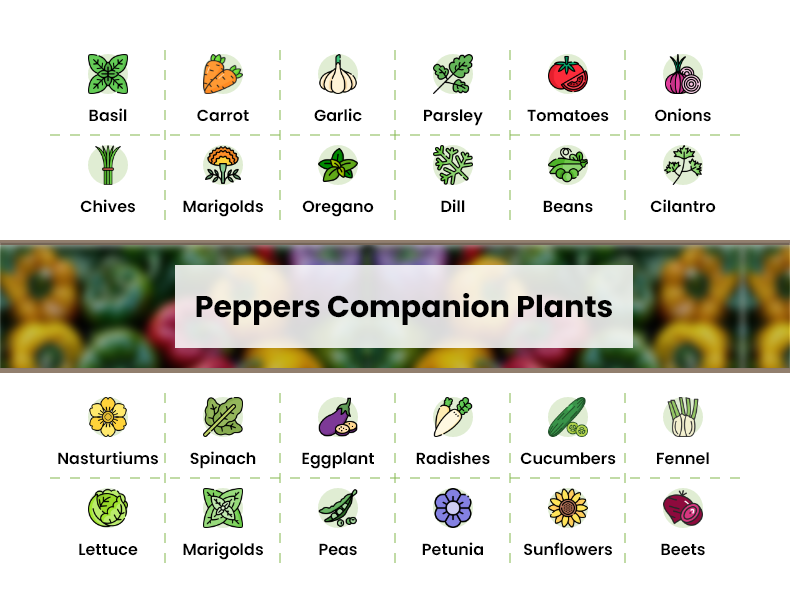
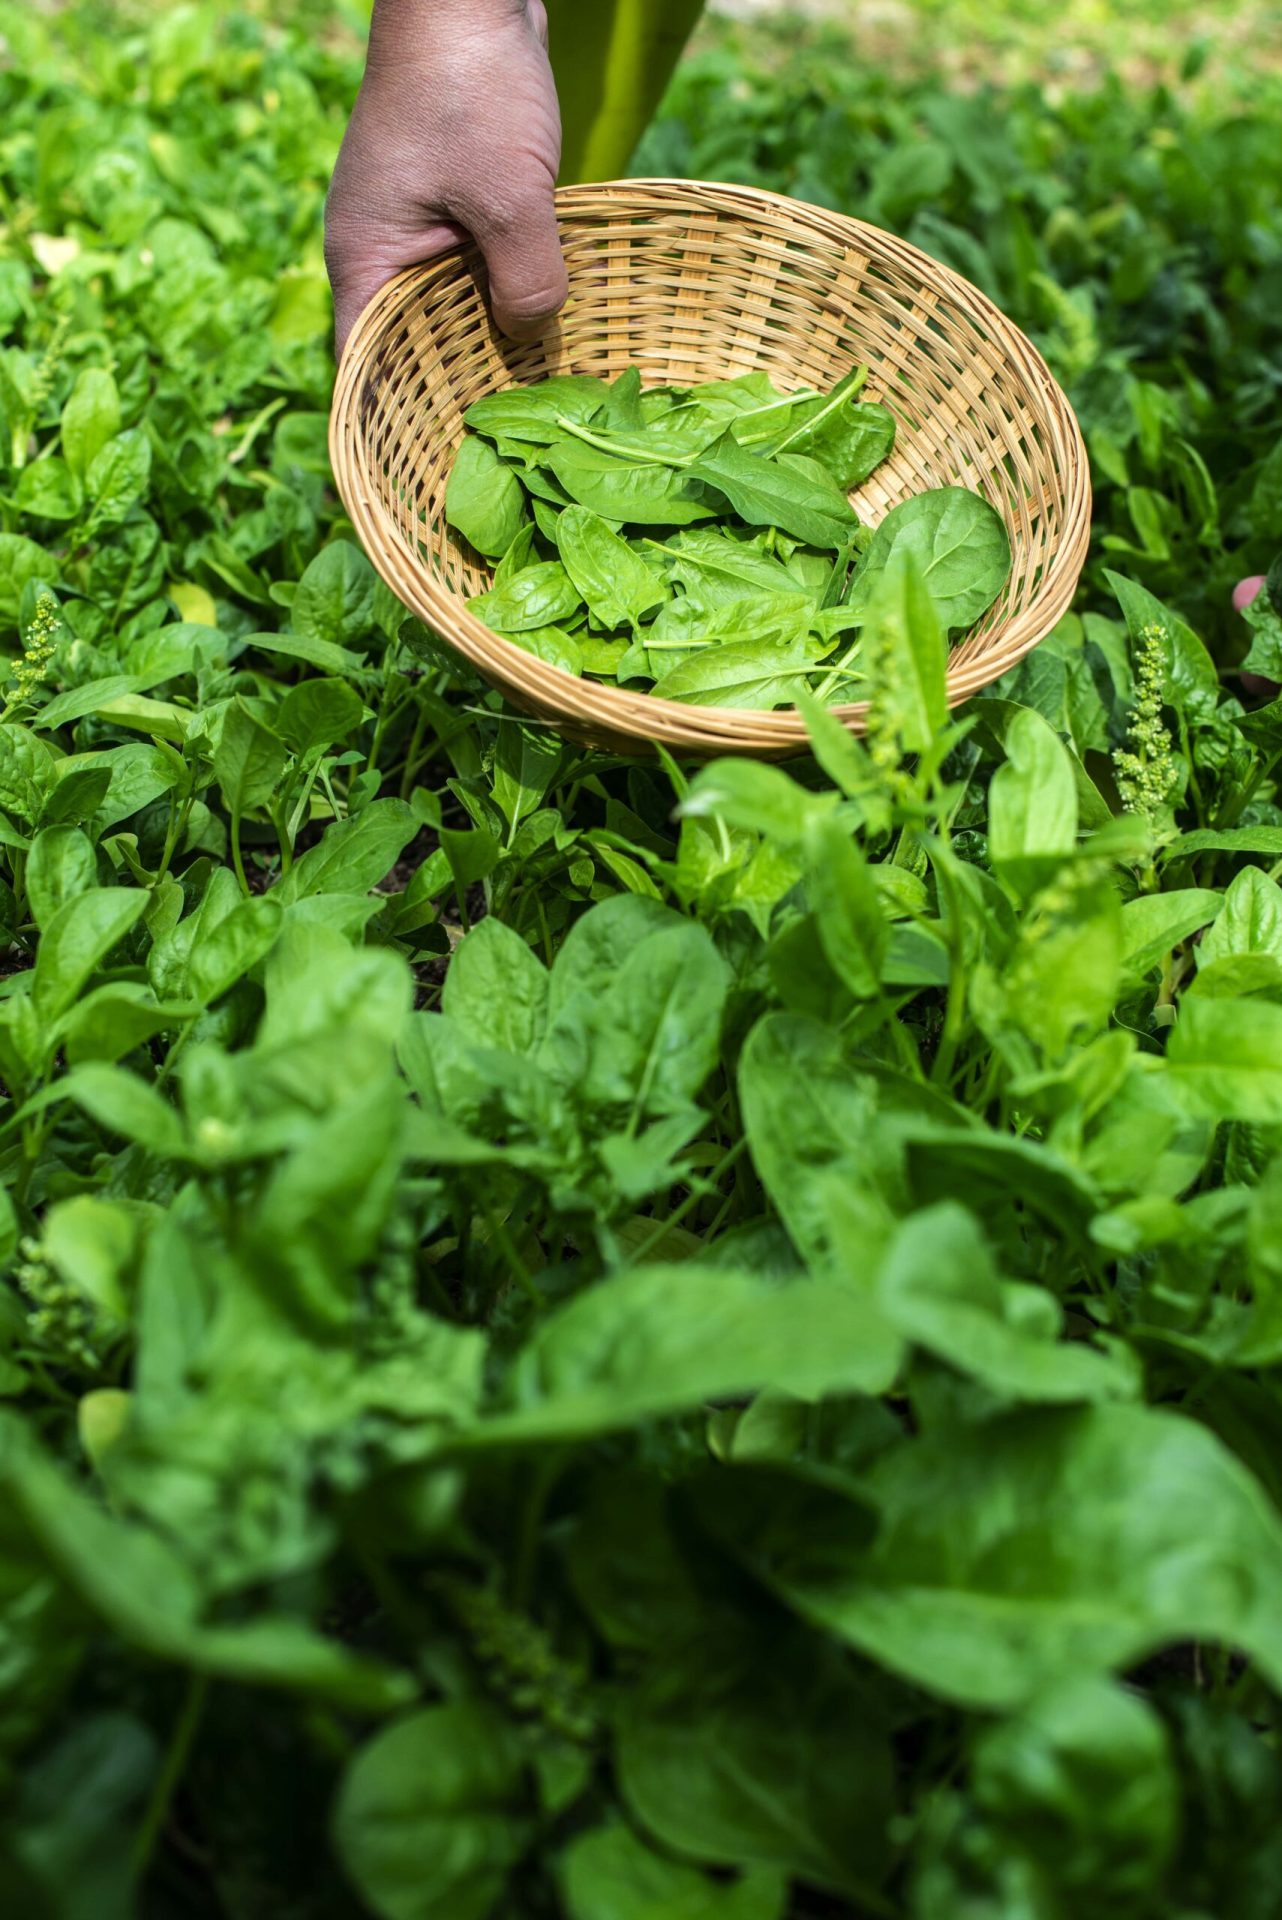
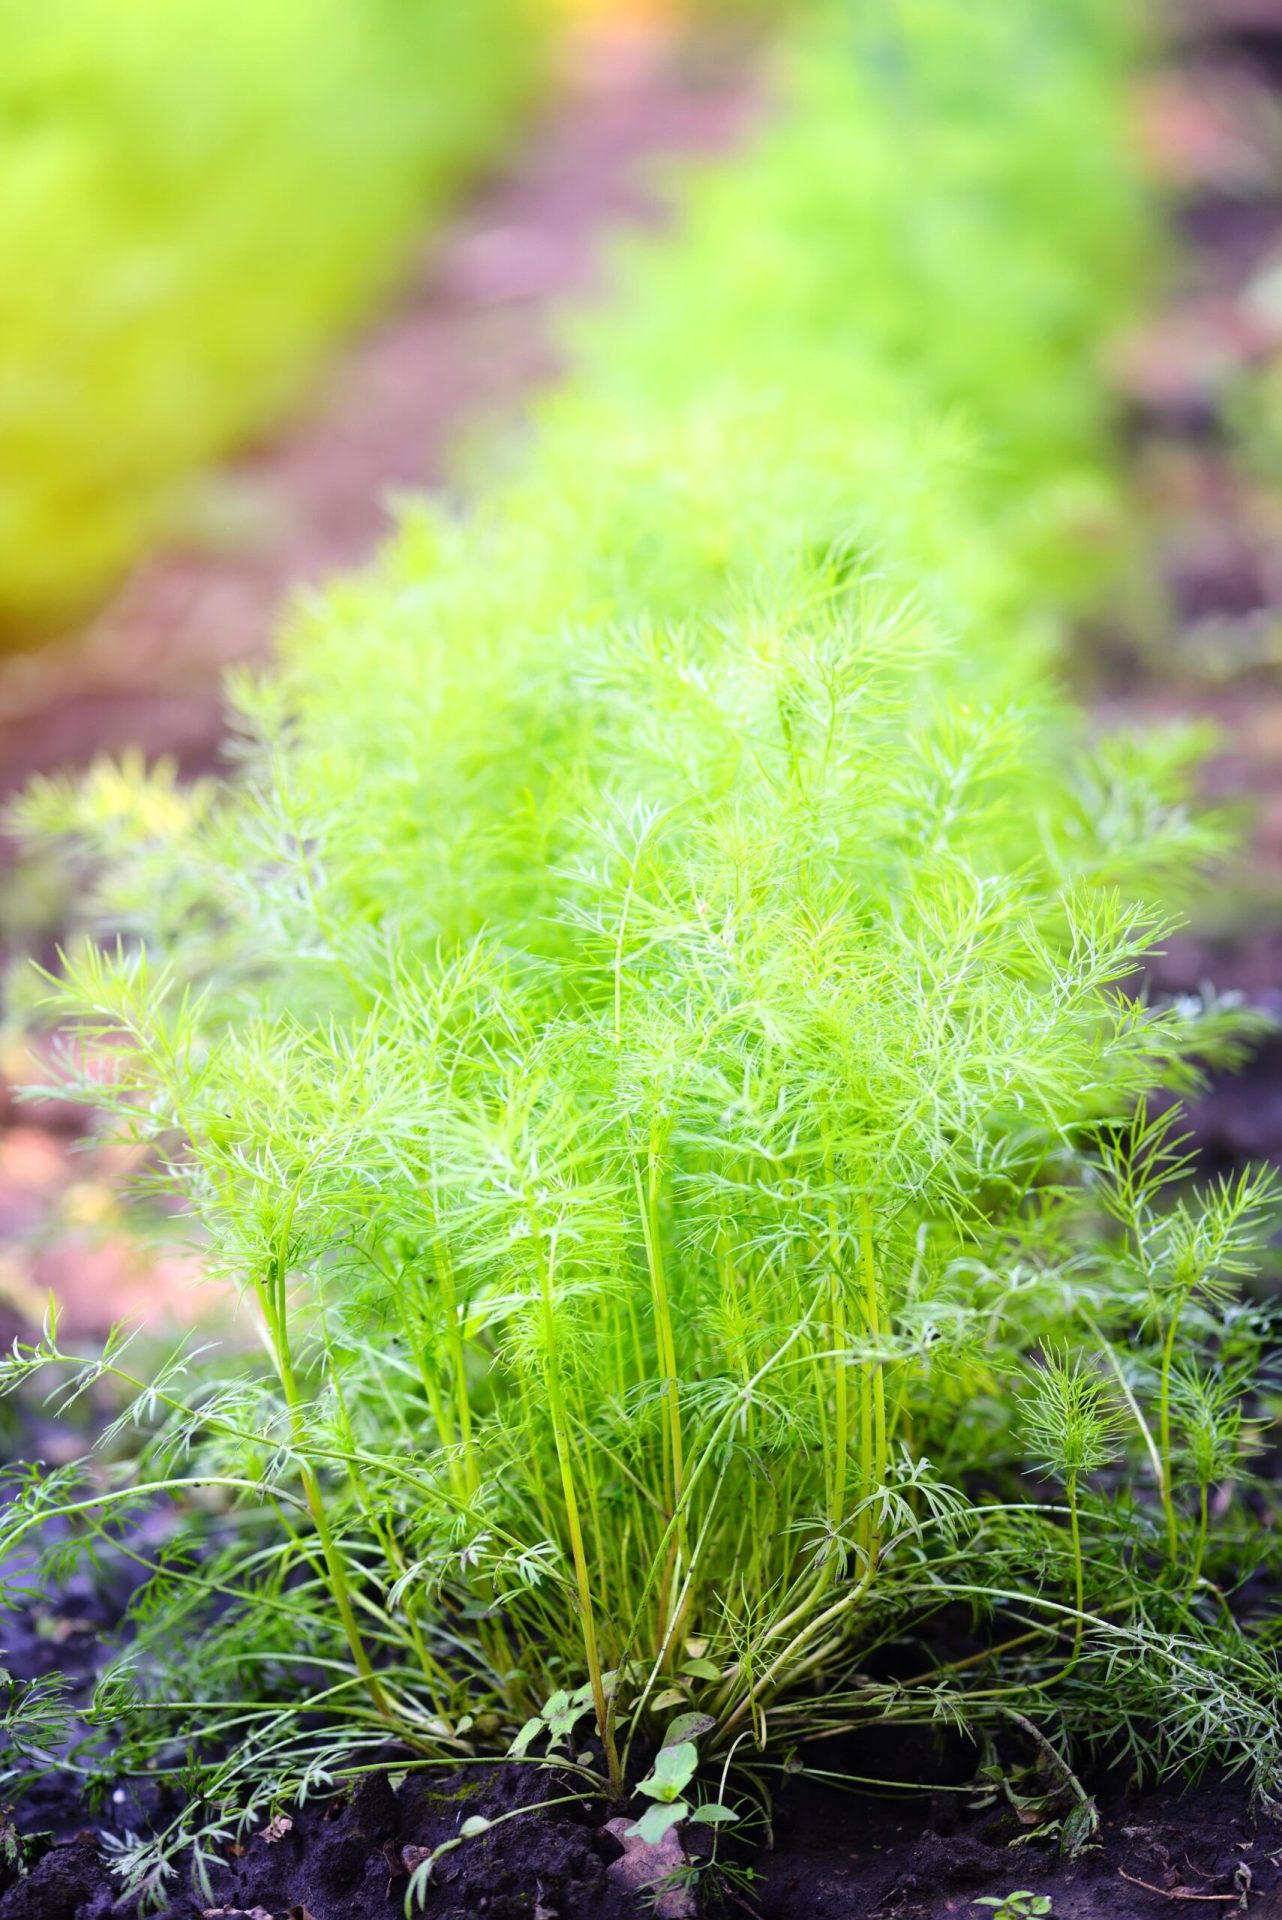
Peppers grow well with different crops. These include basil, carrots, garlic, parsley, tomatoes, onions, chives, marigolds, oregano, dill, beans, and fennel. Whether you’re growing sweet or hot peppers, these companion plants can help produce healthy, fruit-bearing plants.
These companion plants for peppers help in pollination, improve nutrient absorption, increase crop production, and protect against pests and diseases.