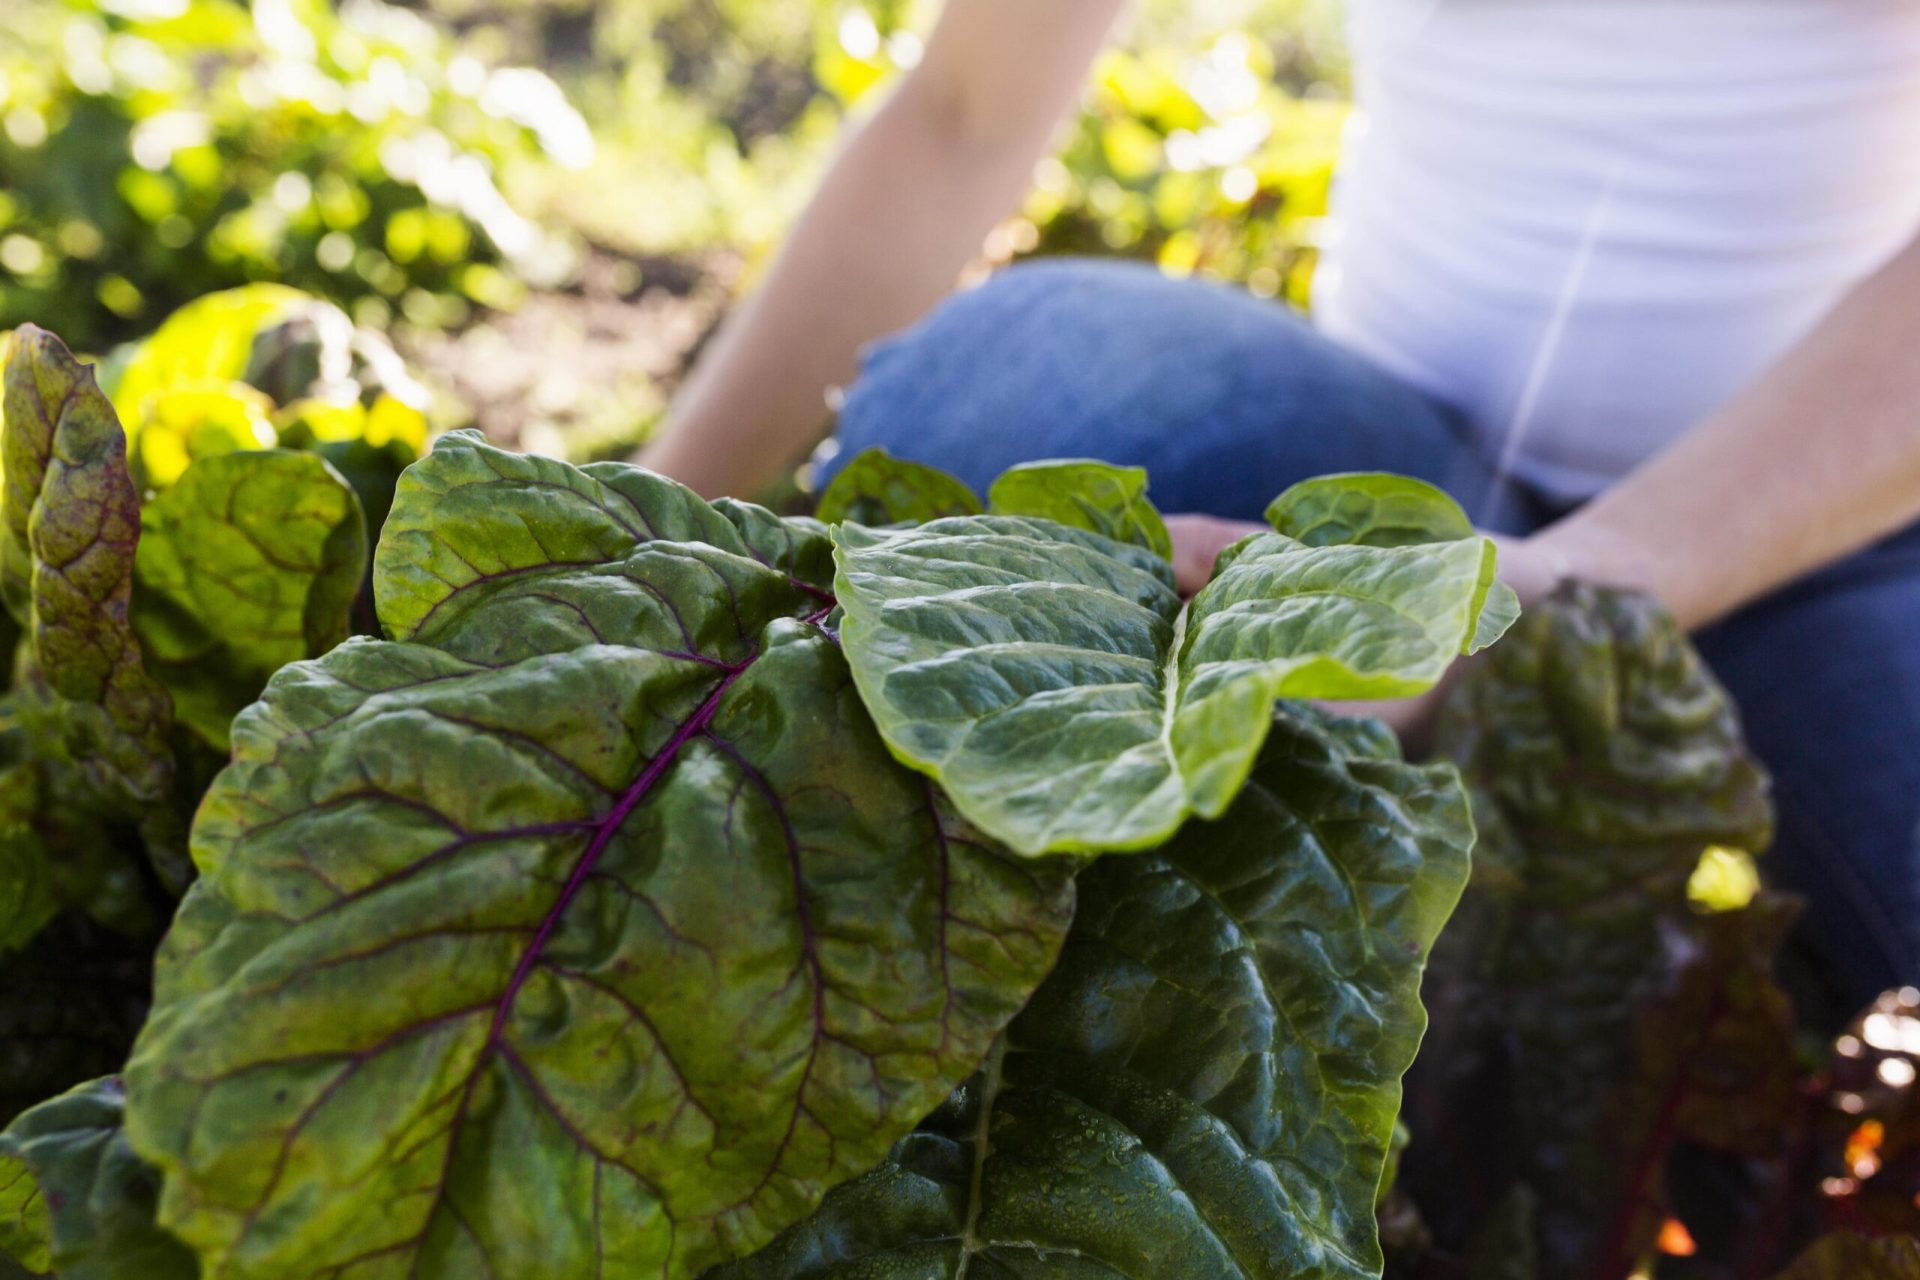
Chard, also known as Swiss chard or silver beet, is easy to grow, hardy, and the best choice for novice gardeners. This cool-season crop has a mild flavor and adds color and nutrition to salads, recipes, sandwiches, pasta, and a lot more. You can eat its stem and leaves raw or cooked.
This Swiss chard growing guide will help you learn how to cultivate and care for this leafy green vegetable. From essential components, growing stages, storing, harvesting process, and chard varieties, you will get to know everything here. So, what are you thinking? Grab your gardening equipment, and let’s continue the green adventure of growing this superfood.
Growing Chard 101: Step-by-Step Guide
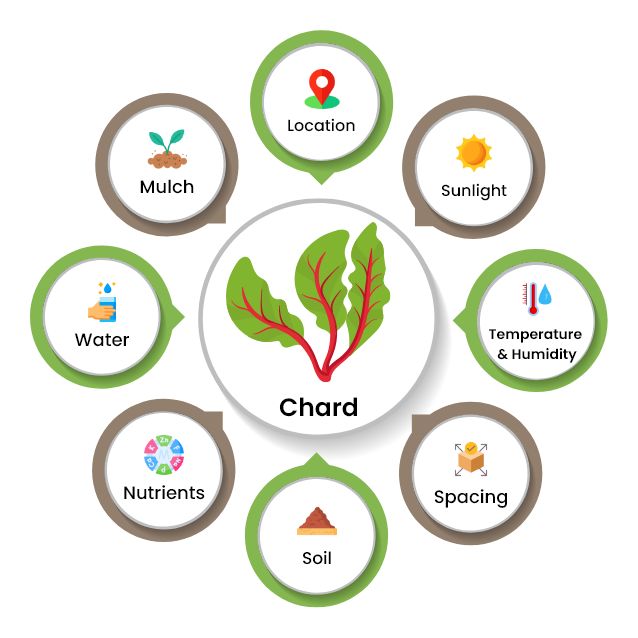
1. Location
Select an open and sunny site, as chard grows best in full sun. It can tolerate some amount of shade in summer.
2. Temperature and Humidity
Chard grows well when temperatures do not exceed 75°F.
3. Spacing
Space seeds about 2 to 3 inches apart and cover them lightly with soil.
4. Soil
It prefers fertile and well-drained loamy soil with a pH between 6.0-7.5.
5. Nutrients
Mix slowly-release organic nitrogen fertilizer like blood meal, feather, or cotton-seed meal into the soil.
6. Water
Water chard regularly and about 1 to 1.5 inches every week.
7. Mulch
Spread a thick layer of mulch-like garden compost around chard plants.
How to Grow Swiss Chard from Seeds?
Growing Swiss chard from seeds is easy as its germination rate is high. Soak seeds in water for 15 minutes before sowing to fasten the germination process.
- Plant chard seeds at a depth of ½ inch in rich, loosened, moist soil up to 1 inch apart and in rows set 3 feet apart.
- Space seeds about 6 to 12 inches apart, depending on the chard variety.
- Water plants at least once a week and frequently during hot weather.
- Fertilize it once with a balanced fertilizer in the ratio of 10:10:10 about a month after planting.
How to Grow Swiss Chard in Containers?
Growing Swiss chard in a container is a great way to add color and interest to any patio, room, or garden.
- Select a container which is 8 inches deep and 12 inches wide.
- Fill the container with all-purpose potting soil and sow seeds.
- Sow seeds ½ inch deep and 1-2.5 cm apart each way.
- Space seeds 6-12 inches apart and a quarter inch deep in the soil.
- Use a watering can with spaced holes to moisten the potting mix.
- After the seedlings emerge, thin them out to leave plants 2-3 inches apart.
- Swiss chard is ready to harvest within 4-6 weeks.
How to Transplant Swiss Chard Seedlings?
The best time to transplant Swiss Chard seedlings is spring to early summer. It provides optimal growth conditions for the chard.
To transplant from seedlings, ensure that plants are ready for harvest with at least one set of mature leaves.
- Harden off seedlings by reducing water and temperature for two to three days before transplanting.
- Before planting Swiss chard seedlings, mix about 2/3rd of organic soil with 1/3rd of compost in the garden bed or container.
- Add organic fertilizers suitable for Swiss chard you have planted.
- Water the soil and dig a hole where the transplant will go.
- Transplant seedlings 4-6 inches apart in rows 18-30 inches apart.
- Ensure you place the seedling in a sunny and well-drained location.
- Be gentle when transplanting chard seedlings to preserve their root system.
- Cover the plant roots and some of the stems with dirt or compost.
- Water plants well.
When to Plant Swiss Chard?
- Chards grow best in cool temperatures. High temperatures slow down the production process.
- For the fall harvest, plant chards in summer.
- In mild winter climate, chards can be grown throughout the winter.
- Plant chard when the temperature is between 50°F and 75°F.
- Sow chard seeds in the garden 2-4 weeks after the frost has passed in spring.
- For an early start, sow chard indoors 3-4 weeks before the last frost date.
- Transplant young seedlings when plants are 3-4 inches tall.
How to Plant Swiss Chard?
- Sow chard seeds about ½ inch deep from 1-2 inches apart.
- Thin out successful seedlings from 8-12 inches apart once they have their first couple of leaves.
- Add a 2–3-inch layer of fresh compost to the soil before sowing seeds or planting transplants.
- Use a dibber to make holes in the soil which are ½ inch deep.
- Place one seed for every planting hole and space seeds at least 8 inches apart.
- Space seeds in rows about 18-24 inches apart. Chards grow quickly from a seed cluster.
- Seed clusters produce several seedlings so thin to the strongest seedling once plants are about 3 inches tall.
- Remove the weak seedlings by cutting them off at the soil level with small scissors.
- Keep seeds well-watered while waiting for their germination.
Chard Growing Stages
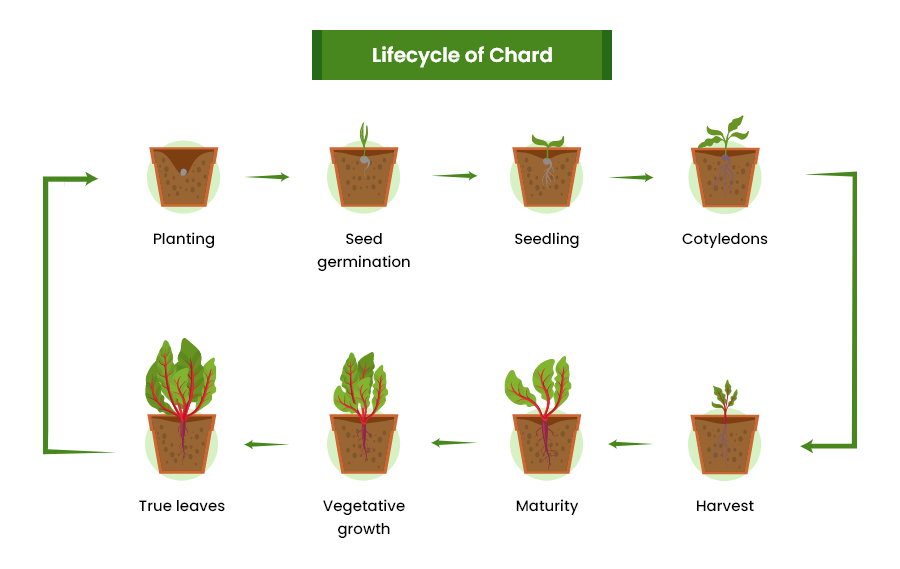
1. Seedling
Swiss chard starts as a seed planted in the soil. It develops its first set of true leaves after cotyledon leaves emerge. It lasts for about 2-3 weeks after germination.
2. Vegetative Stage
The plant focuses on its leaf and root growth. It produces more leaves, and they increase in size. It lasts several weeks, based on growing conditions like soil fertility, temperature, and water availability.
3. Bolting Stage
The plant shifts from leaf production to seed production and flowering. Bolting occurs when temperatures rise, especially in warm climates. When this leafy vegetable bolts, it sends up a central flower stalk.
4. Flowering Stage
The Swiss chard plant produces flowers on the central stalk. The flowers are small and greenish white in color. To grow chard for its leaves, harvest it before the flowering stage because the leaves turn bitter.
5. Seed Production Stage
After flowering, this leafy green vegetable produces seeds if pollination occurs. The seeds develop in clusters on the flower stalk. If you are growing Swiss chard to save seeds, allow them to fully mature and dry on the plant before harvesting them.
Apart from these growing stages, taking proper care, which includes watering, fertilizing, and pest control, is essential. This influences the lifecycle of Swiss chard and its overall health.
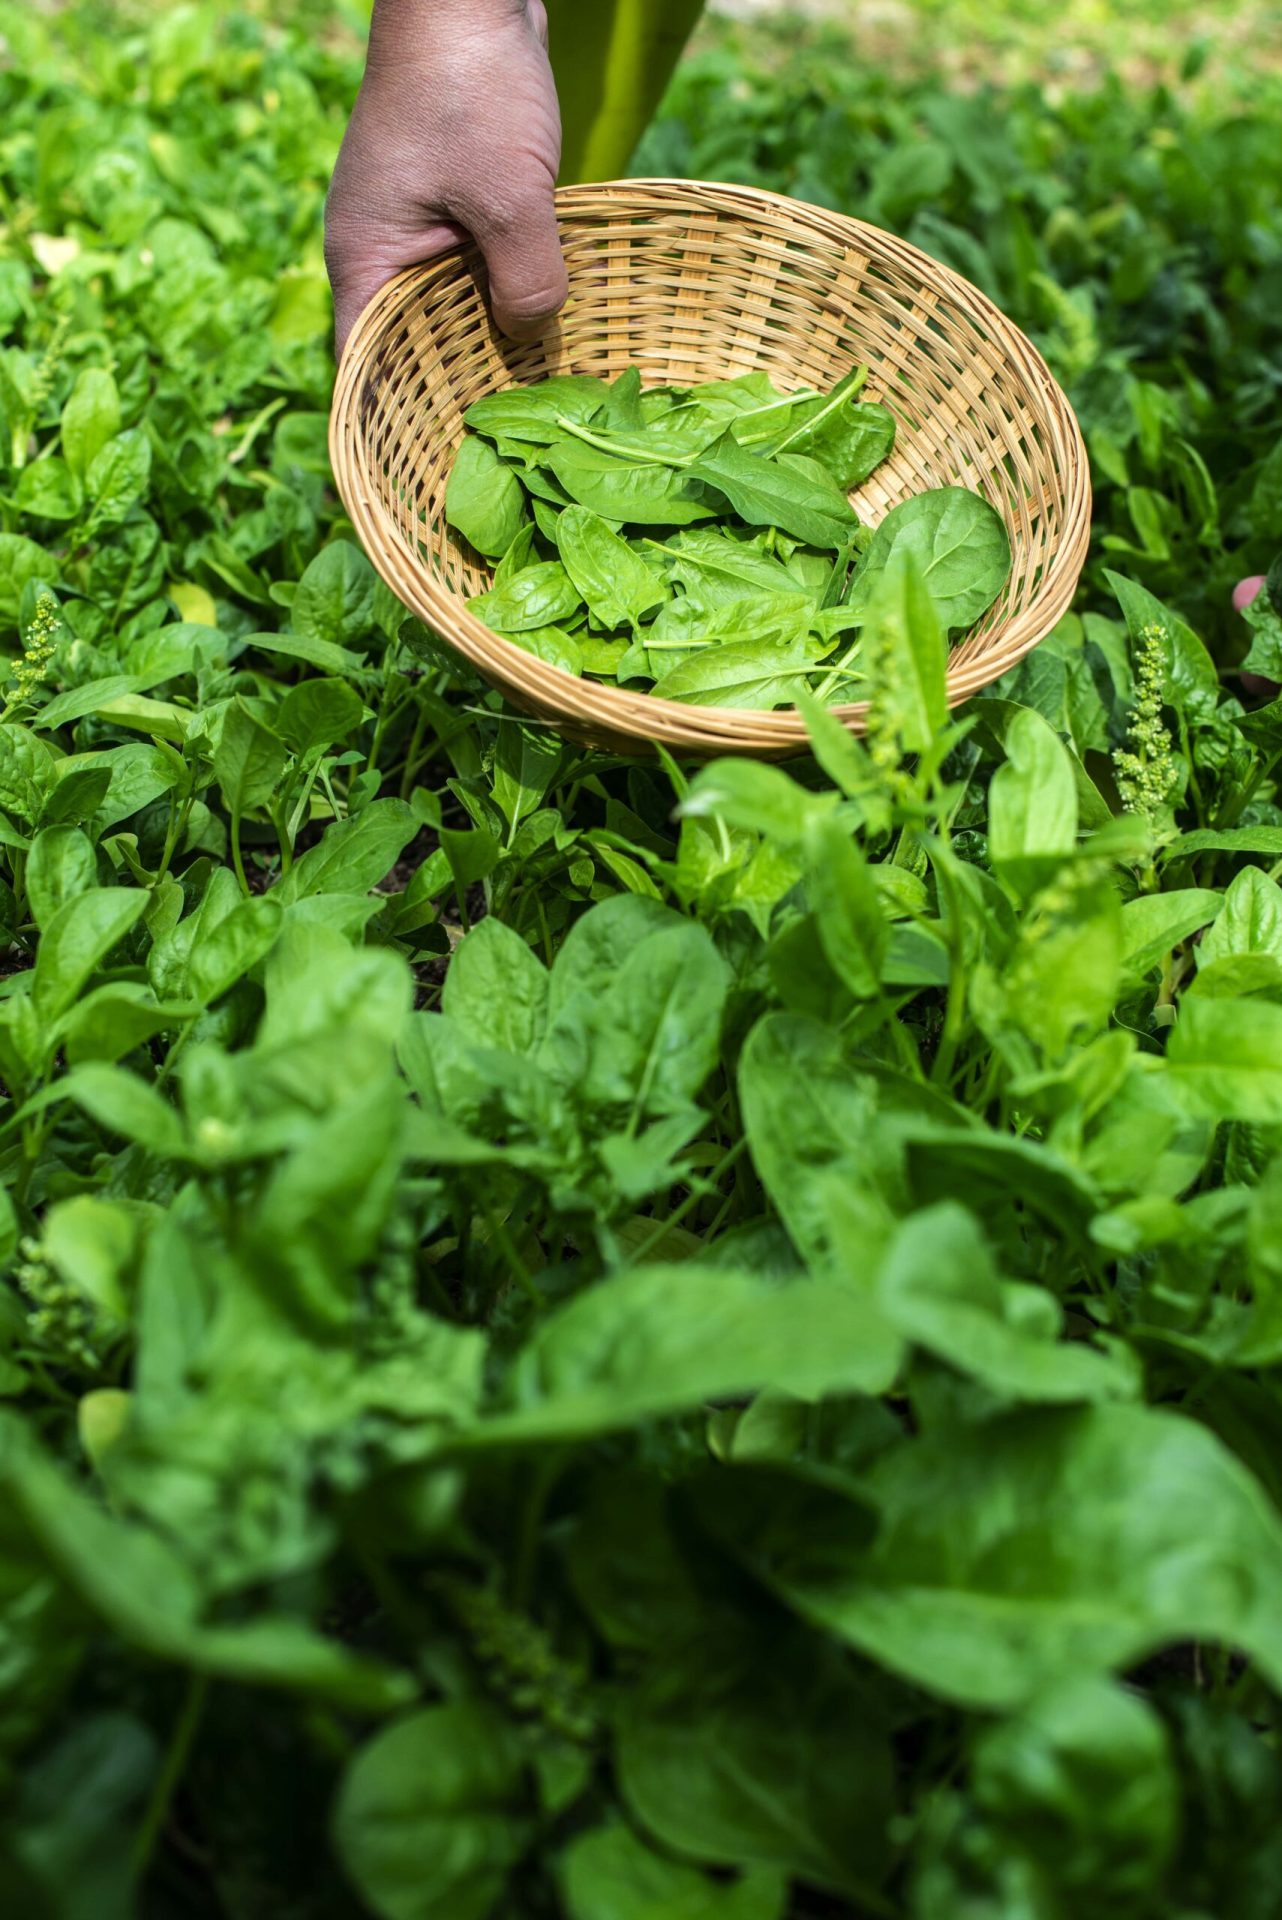
How to Harvest Chard?
The best time to harvest chard leaves is early morning or evening. You can harvest Swiss chard while its leaves are tender, young, and smaller than 4 inches (10 cm.) or after maturity.
- Chard is ready to pick 30 days after sowing if you want baby leaves.
- Harvest chard in 45 to 60 days for full-size leaves with a thick mid-rib.
- Once you harvest Swiss chard, the plants will continually harvest until it frosts.
- To add chard leaves to salad, snip its leaves when they are small.
- Cut chard using garden scissors or a serrated bread knife.
- Cut chard leaf by leaf – cut the outer leaves first, allowing the inner ones to grow larger.
- You can cut the whole plant one inch above the soil.
How to Store Chard?
You can keep Swiss chard fresh for a long time in the refrigerator, from a few days to even weeks, with these storage steps:
- Remove any wilting or blemished leaves from the bunch.
- If the chard leaves are damp, pat them dry using a paper towel, as excess moisture leads to spoilage.
- Trim the ends of the stems if they appear discolored or wilted as it will extend the life of chard.
- To keep Swiss chard fresh and crisp in the refrigerator, leave them unwashed.
- Wrap it in a paper towel to prevent leaves from wilting or drying.
- Store it in an unsealed plastic or perforated bag and place it in the crisper drawer.
Best Chard Varieties
To decide the best chard variety, consider taste preferences, growing conditions, and intended use. Some Swiss chard varieties have a reputation for their flavor, yield, and adaptability. Let us discuss the best 3 varieties in brief:
1. Rhubarb Chard
It boasts ruby red stems that contrast beautifully with its glossy green, deeply crumpled leaves with dark red wide stalks and veins. Its stalks are slightly flat and crimson. Its mature leaves turn juicy and tasty when cooked, while its baby greens are used in salads. It has a slightly more robust flavor than other varieties with a hint of earthiness, adding depth to the variety of dishes.
2. Bright Lights
It is known for its vibrant and multi-colored stems, which grow in shades of yellow, red, orange, white, pink, and even striped. It has tender, large, wavy leaves with a mild flavor and deep red stalks. It is resistant to bolting, has excellent cold resistance, and is highly resilient to insect pressure. It is harvested when it is young as its dark green leaves taste delicious when eaten as salads.
3. Orange Fantasia
This pretty chard variety retains its color even after being cooked. This open-pollinated type has bright orange stems and deep green savoyed leaves with a slightly sweet flavor. It has broad, thick, crisp stems with a pleasing flavor.
It is tolerant to cold, heat, and bolting. It is harvested when it is young, tastes nice in salads and proves a colorful addition to stir-fries.
Common Pests and Diseases Problems with Chard
When growing Swiss chard, you should take care of the plant throughout its growing stages and then harvest it at a suitable time. One thing to watch out for is pesky pests and harmful diseases. Keep a watchful eye and take preventative methods to keep your plants safe throughout their growing stages.
Pests that can affect the growth of Swiss chard are spinach leafminers, cutworms, slugs and snails, aphids, and flea beetles. Diseases affecting chard growth include mystery fungus, cucumber mosaic virus, downy mildew, and leaf spot.
Companion Plants for Chard
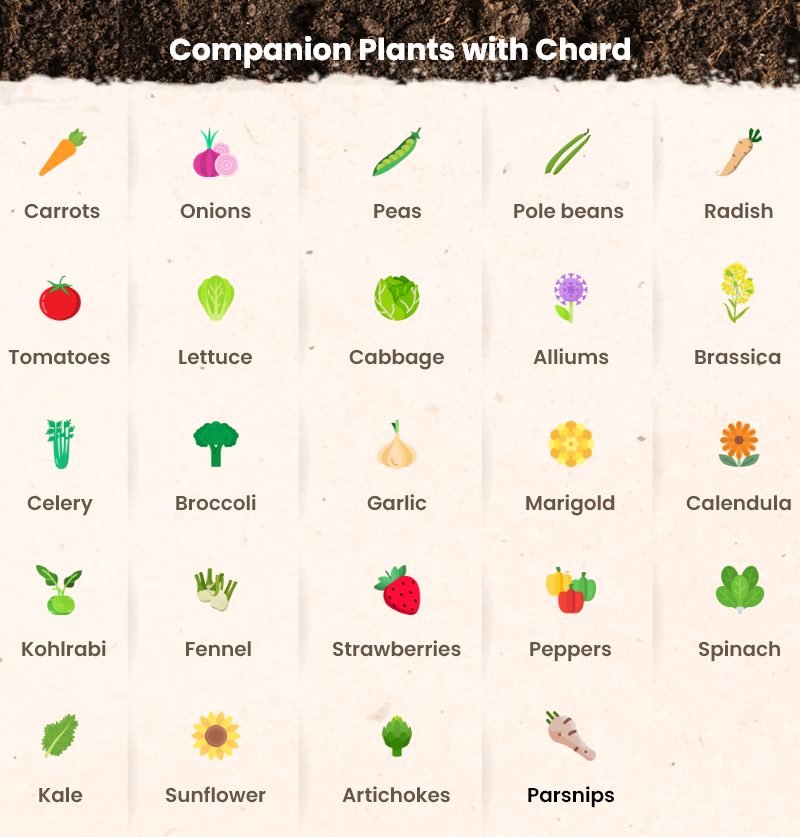
Swiss chard is a light feeder which is not prone to disease or pest problems. You can help it grow strong and healthy with companion plants.
Select plants that mature after this leafy green vegetable is ready to harvest. Why? It will prevent these plants from overshadowing Swiss chard. Plants like onions, peas, tomatoes, and lettuce prove good companions for Swiss chard in the garden.