Growing fresh arugula in your garden will transform your salad game in summer! Each tender leaf tells a tale of flavor and freshness. Known for its peppery zing, zesty flavor, arugula’s vibrant green leaves add a spicy taste to salads, sandwiches, and other dishes.
Fortunately, it’s one of the easiest leafy greens to grow in the garden. Arugula grows quickly, and these plants are hardy, which makes them an ideal addition to your salad garden path! Need some tips for maximizing your arugula harvest?
Explore our arugula growing guide and learn about the ins and outs of how to grow arugula.
Growing Arugula 101: Step-by-Step Guide
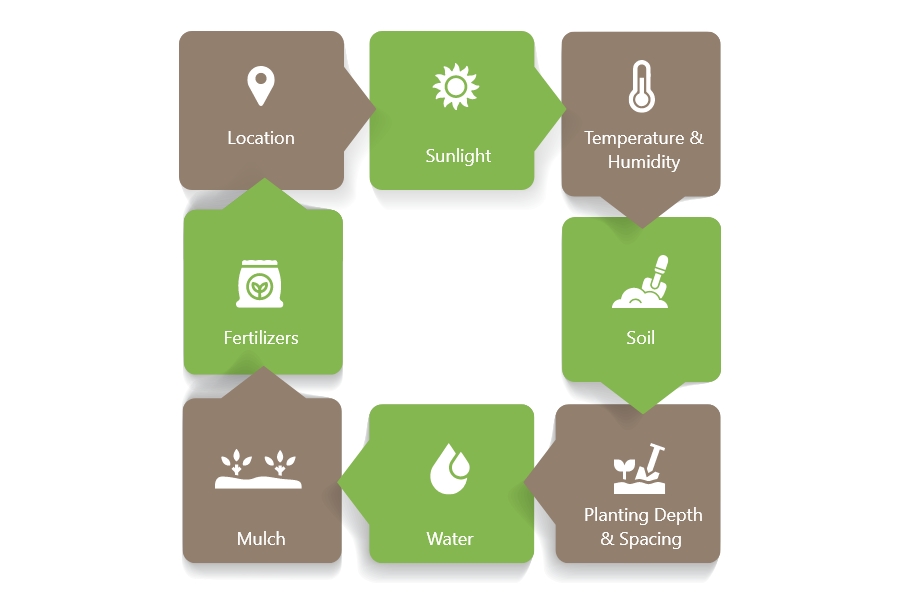
1. Location
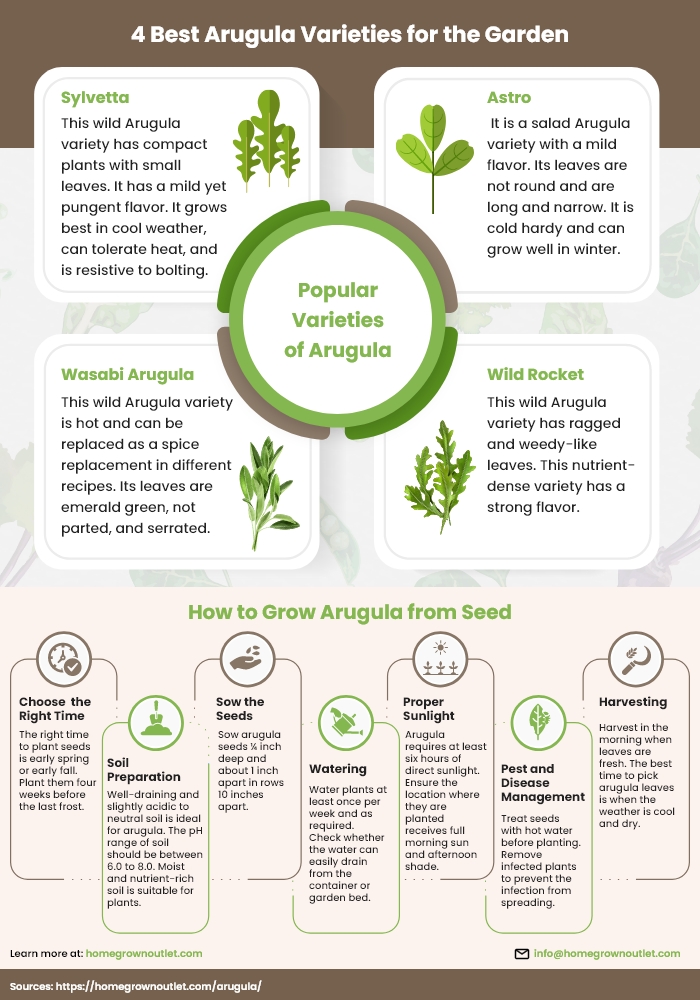
Arugula plants grow well in partial sun, especially in hot climates. Provide some noon shade to the plants as the temperature increases in summer. You’ll want to choose a sunny location with well-draining soil and excellent air circulation.
2. Sunlight
Arugula plants grow well when they get six hours of direct sunlight. As the extreme heat in the afternoon affects arugula, place them where they receive full morning sun and afternoon shade.
By providing a bit of shade, you can prevent plants from wilting and bolting. Too much sun will trigger the plants to flower and go to seed, which limits harvest yields.
3. Temperature & Humidity
Arugula likes cooler temperatures, between 45 to 65°F. It can withstand winter (in milder climates) but not the extreme summer heat. Covering arugula with row covers and shading it can extend its growing season when kept warm. However, this is generally a spring or fall crop.
4. Soil
Arugula plants require well-draining, slightly acidic to neutral soil. The soil pH range should be between 6.0 to 8.0. They can withstand different types of soil but prefer moist and nutrient-rich soil. Mixing organic matter or compost into the soil improves draining and fertility. Do this before transplanting or directly sowing seeds in the spring.
5. Planting Depth & Spacing
Plant arugula seeds about a quarter inch deep with one inch of spacing between seeds. Space rows about 10 to 12 inches apart. Generally, you’ll want to thin plants to 2-3 inches apart or 6 inches apart, depending on the size of plant you desire.
6. Water
Water arugula plants at least once per week. Keep an eye out of dry conditions. If the top 1-2 inches of soil is dry to touch, it’s time to water your plants. However, avoid over-watering your garden. Water plants only when required, and see that water can drain easily from your container or garden bed.
In dry climates, water arugula plants every morning. An uneven watering schedule will cause bolting and can result in more bitter greens.
7. Mulch
Mulch helps retain moisture, prevent weed pressure, and maintains an even soil temperature. This is especially important for arugula, because high soil temperatures will trigger bolting.
Use organic mulch to cover the soil around arugula plants as it keeps weeds at bay. It protects the ground from overheating, essential in late spring when the sun gets intense in the afternoon.
8. Fertilization
If you plant arugula in nitrogen-rich soil, you don’t need to add fertilizer. However, be sure to recognize the signs of malnourishment. Pale leaves indicate a lack of nourishment, so mix in compost in your soil before planting.
How, When & Where to Plant
How to Plant Arugula?
Dig a shallow trench with your garden spade to mark the row for planting arugula. Sprinkle arugula seeds along the trench, trying to space the seeds about 1/4″ to 1″ apart.
To harvest full-sized leaves, increase the spacing or thin out the plants once established to about 6 inches apart.
Cover them lightly with soil because the seeds will require light for germination. If you bury them deeply, they will not germinate.
When to Plant Arugula?
As arugula grows quickly, direct sowing is the best option. Plant arugula outdoors when the soil temperature is between 40-55°F.
In cold weather or during a freeze, you can protect arugula using a covering. If you have a short growing season or are excited to eat it, plant arugula indoors four weeks before the last frost.
Where to Plant Arugula?
If self-seeding is an issue, consider planting arugula in a contained area or pots. You can plant them indoors in containers. They are ideal for indoor gardens, as they grow quickly and don’t require a lot of light.
You can grow arugula in pots as a ground cover for larger plants. As arugula roots are shallow, they don’t interfere with the bigger plant.
Arugula Growing Stages
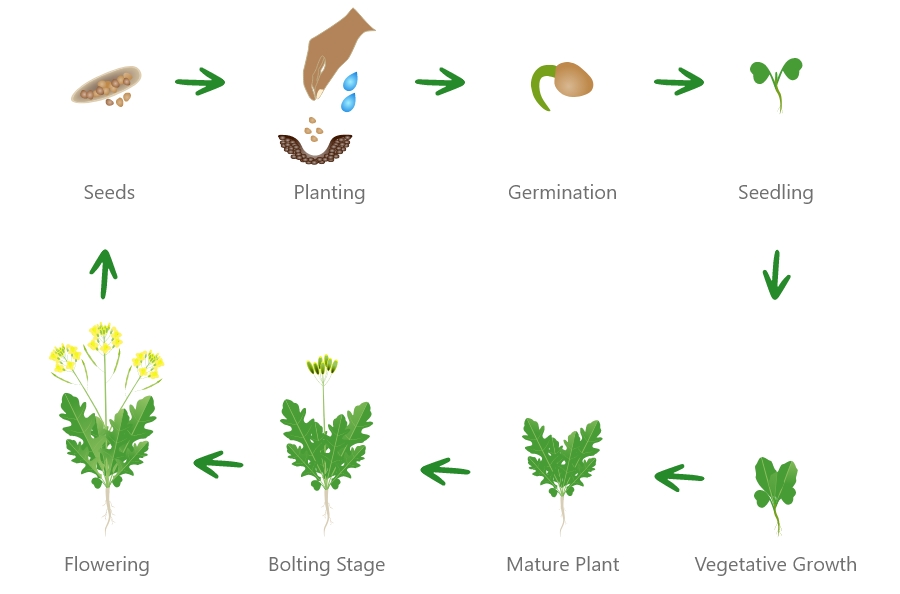
1. Seed – Arugula seeds are small, round, and can have a brown, gray, or black color. Arugula plants start from seed. With high-quality seeds, germination rates will be high, and arugula starts to sprout within a week.
2. Germination – You can plant arugula seeds into the soil or in a seedling tray and then transplant them. It takes 3-4 days for arugula seeds to germinate. A tiny root appears from the seed, and then two tiny leaves grow next. Roots and leaves grow bigger and longer after a few days.
3. Seedling – Once seeds germinate, they turn into seedlings, which have short and soft roots with thin stalks and a few leaves. At this stage, seedlings require more sunlight, nutrients, and water to grow bigger.
If planted in the seedling tray, transplant them in this stage. You can also move them to a container or the garden. Transplant them in 10 to 15 days. Planting them with enough space will give them sufficient room to grow.
4. Vegetative Growth – After the seedling stage, the plant grows bigger and becomes more mature. In this stage, arugula plants produce more roots, leaves, and thicker stalks.
In this stage, the plant requires more sunlight, water, and nutrients. You can harvest arugula in 6 to 8 weeks, if grown from seed, and in hydroponic gardens, within as little as 20-25 days.
5. Flowering – If you don’t harvest, arugula plants will bolt and “go to seed”. This occurs after 8-10 weeks of growing. In this stage, the plants will produce white flowers with four petals. The flower grows a long stem. Let the flowering process continue and wait for the flowers to mature.
6. Seeding- When arugula flowers mature, they eventually grow pods and have seeds. Collect and save as many seeds as possible from a single arugula plant.
To collect seeds, you must wait for the seed head to turn dry and brown. Cut the seed pods and stalk off the plant carefully to prevent pods from opening. One solution: Hang the flower heads to dry over a bucket to collect the seeds.
How to Harvest Arugula?
The harvesting time for arugula depends on planting time, as per your growing zones and conditions. However, there are a few methods:
- Grazing – You can start to remove a few leaves from each plant after about 25 days.
- Cut and Come Back – With this method, you cut back the entire plant (and new leaves will grow in its place).
- Full Growth – Wait until the plants are fully mature, and pull them up, roots and all.
When to Harvest Arugula?
You can gather arugula leaves in three distinct stages as per your flavor requirements.
STAGE 1: Pluck the tender leaves after 20 days of planting, when they grow about 2 inches. It works well for people who prefer mild pepper notes.
STAGE 2: If you like more intense flavors, allow arugula to grow beyond 3 inches.
STAGE 3: The final stage arrives before the plant is ready to bolt. This is when the temperature hits about 80 degrees Fahrenheit. It grows into small, lobe-less leaves, unlike the typical rounded arugula green. Harvest arugula in its entirety at this stage, or else the leaves will turn highly bitter.
Selecting The Best Time of the Day to Harvest
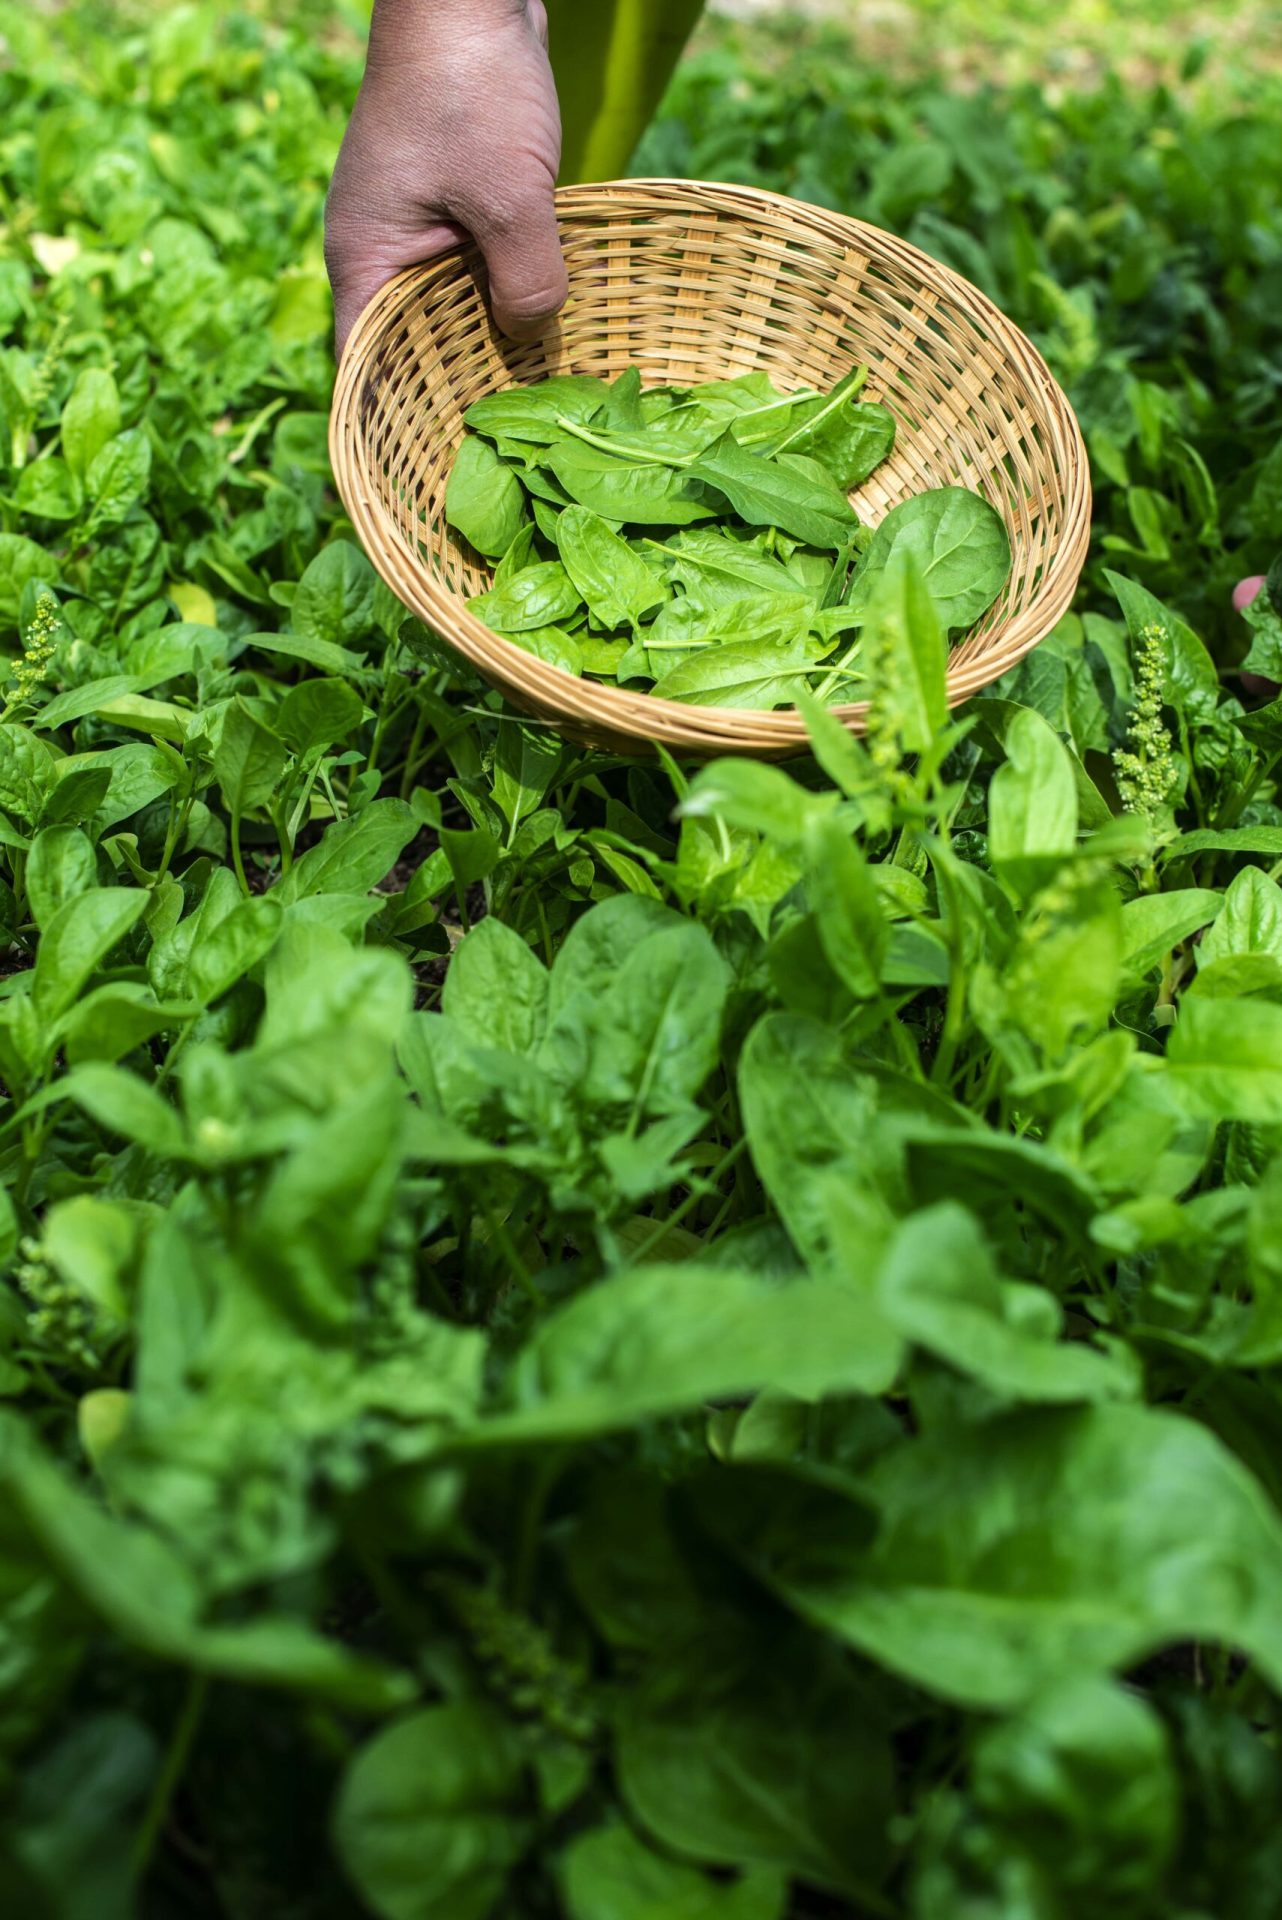
Pick arugula leaves when young and tender, usually around 4 to 6 weeks after sowing. Harvest in the morning when the leaves are at their freshest.
The time you harvest arugula determines its quality. You should never harvest it during hot sunny days. The hot weather strips the leaves of their moisture, causing them to wilt quickly.
Harvesting during wet weather can make the arugula leaves soggy, making them unsuitable for salads.
The best time to pick leaves is dry and cool days, as the leaves will have high moisture. Such times occur in the early morning after the evaporation of dew or in the evening around sunset.
If you are harvesting the leaves during the heat, place them in a cool location to avoid immediate wilting. Remember to harvest its leaves before winter hits, to protect plants from frost, as their leaves will become inedible.
How to Store Arugula?
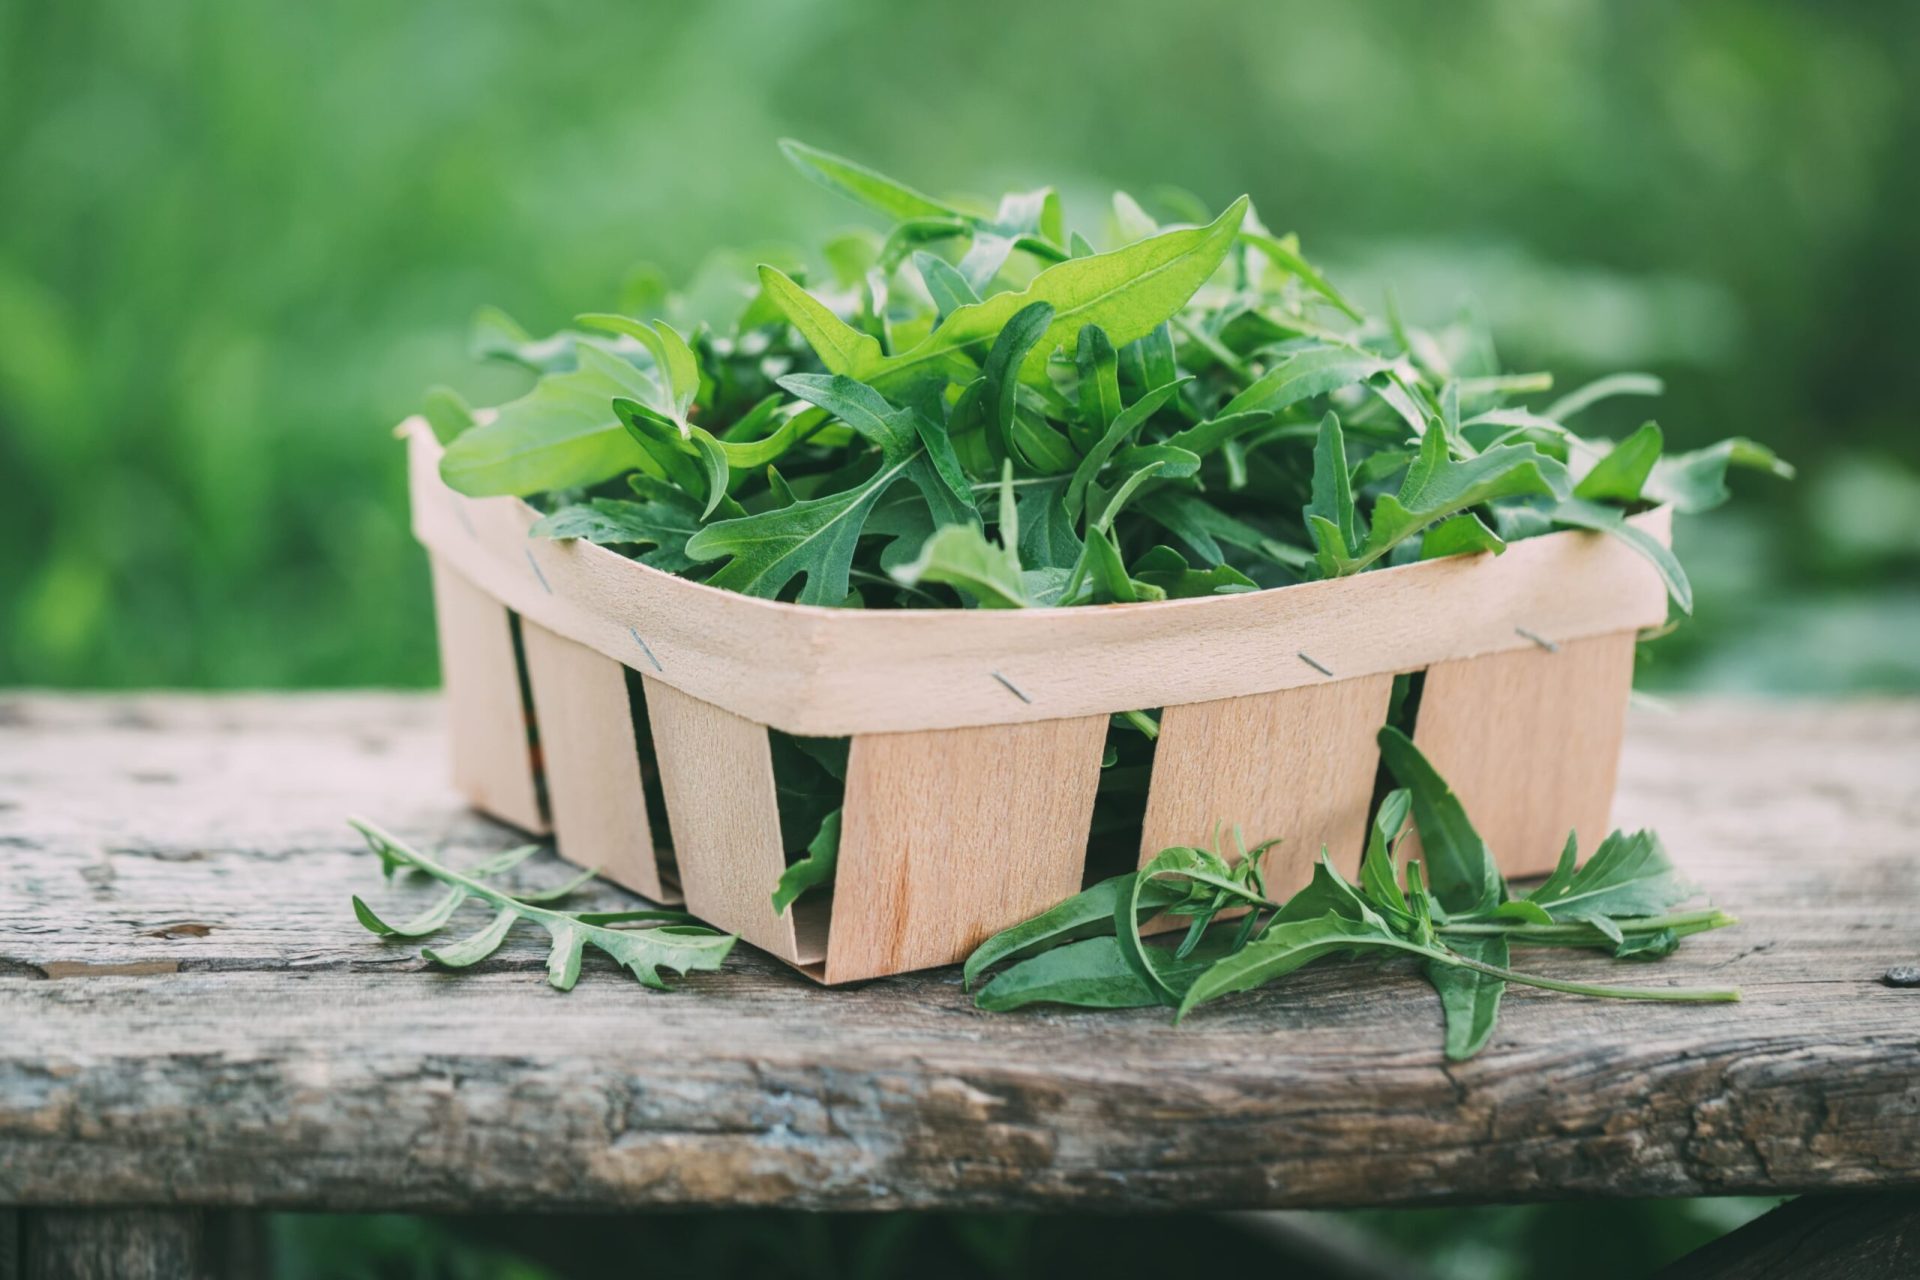
Consume arugula soon after you harvest it to maximize its nutritional value and flavor. Arugula is best when consumed fresh, but when you have surplus leaves, you can store them in the refrigerator.
- When preparing arugula for storage, don’t forget their stems. To keep arugula fresh for a long period, trim their stems before storing.
- Take a sharp knife or shears and remove the bottom portion of the stems, about an inch or so. This will prevent excess moisture from collecting at the bottom.
- To store them for a long time, you should wash them to remove any dirt, debris, or bacteria from the surface of the leaves.
- This will help prevent the appearance of brown spots, which appear in unwashed leaves. For anti-bacterial protection, use a vinegar solution to wash arugula.
Storing Arugula in Fridge:
- Keep the leaves cold and moist. Place them in a reusable plastic bag and use a damp paper towel to provide moisture and prevent them from drying out.
- Poke some holes in the plastic bag as an additional measure to avoid excessive condensation.
- Fresh arugula leaves stay fresh for about 4 to 5 days.
- Check them regularly to detect any signs of wilting or spoilage. Remove spoiled leaves (if any) immediately to prevent them from spoiling the rest of the batch.
TIP: When storing arugula, flavor is one of the key things to consider.
With these simple tips, you can preserve arugula and keep it fresh and vibrant for a long time.
Arugula Types
Two types of arugula exist: Wild arugula and salad arugula. We categorize arugula varieties depending on both these types.
1. Wild Arugula: Most people choose to grow this perennial type annually, even though it takes a while to germinate. Arugula varieties that fall under this type take slightly longer to germinate. It has jagged leaves with a yellow flower.
2. Salad Arugula: People naturalized this salad arugula variety in the early Middle Ages, and it is less spicy. It has round leaves that germinate quickly in as little as three days and bears white flowers.
Arugula Varieties
Here are some great varieties of arugula plants recommended for home and market gardens. Each type might differ in flavor, harvest time, leaf shape, and size.
1. Astro
Astro is one of the famous arugula varieties for good reason. This salad variety has a mild flavor, which many anti-arugula eaters will like. Plant Astro in the cool season as they become spicier in heat. It is cold hardy and grows well in winter with slight protection in different climates.
The leaves are not round and are long and narrow. The white flowers have pink veins and taste good when picked as soon as they open. It can adapt to several gardening styles, and you can grow it via hydroponic method, soil cultivation, and as microgreens.
2. Sylvetta
Sylvetta is a wild heirloom arugula that is also famous. The plants are compact and have smaller leaves with a mild yet pungent flavor. It has an excellent tolerance to heat and is resistive to bolting. It grows best in cool weather.
This all-round arugula variety is suitable for hydroponic growing and microgreens. It takes a while to germinate (about 14 days), so water it sufficiently and wait for some time after sowing the seeds.
3. Wild Rocket
Wild Rocket is a wild arugula variety and is an interesting variety to grow. This arugula has ragged and weedy-looking leaves and has a weed-like appearance than a healthy vegetable. This nutrient-dense variety possesses a strong flavor.
It grows up to 50 cm tall in 40 days and has a deeper lobe in the leaves than Astro arugula, which gives it a distinct look.
4. Wasabi
If you like to spread Wasabi on your delicious sushi, then this arugula variety is for you. This wild variety is so hot that it can serve as a spice replacement in different recipes. Apart from being a perk over spice, this variety is high in vitamin A.
Its leaves are emerald, green, softly serrated, and not parted. It grows about 10 to 20 cm (4 to 8 inches) tall and matures around 35 days after germination.
Plant Wasabi in spring, sow it early and every two weeks for a continuous harvest until summer.
